

A month ago was my Grandma's 90th birthday, and to celebrate my family all went to dinner. I made these cookies to go on the place settings when everyone was seated. My Grandma loves Tweety so we went with him for the cookies. Decorating cookies is what I specialize in...especially character cookies. Once you learn how to do a basic character it's easy to take that idea and use it as a template for any other characters you do. Especially animation characters with black outlines. This tutorial is to show you how to do a basic character. The more you decorate the more you'll learn how to break down a design and in what order to decorate it. This tutorial will show you how to decorate Tweety, with general instructions that will apply to any cartoon character!
Tweety Bird Cookies
Decorating level: Medium
Concept and execution by Jesika Rose, Tweety Bird is a creation of Bob Clampett, Looney Tunes, and Warner Brothers. I claim no ownership of his design and these cookies were for personal use only.
Concept and execution by Jesika Rose, Tweety Bird is a creation of Bob Clampett, Looney Tunes, and Warner Brothers. I claim no ownership of his design and these cookies were for personal use only.
- Gluten Free Chocolate Sugar Dough Recipe or the gluten free regular sugar dough recipe of your choice. I'll be posting a "regular" gluten free dough recipe in the next few weeks =)
- Royal Icing Recipe
- 4" Circle Cutter
- 7 Decorating bags, couplers, tips, and rubber bands
- Two #3 round tips
- Four #2 round tips
- Four #1 round tips
- Toothpicks
- Edible Ink Food Safe Markers
- Gel food coloring:
- Sky Blue
- Lemon Yellow
- Orange
- Black
Once your cookies are baked and completely cooled, you can start to decorate. The first thing I do when decorating a character that I have to repeat (and that the cookie isn't cut to its shape) is to make a stencil. Either draw it or print it to the correct size. I just use plain paper and "laminate" it with tape. This way all your cookies are uniform.

For these cookies I did a stencil the outline of the head and of the eyes. Either use a food marker or scratch in with a toothpick. When you're doing a character, you want elements that should be flush to be all together on the first layer, and elements that can be raised on the second. With Tweety as an example, the white of the eyes and the yellow base should be flush, and something like say, the beak can wait til the second layer. The first layer will always look very strange! But keep on going and it will work out!

For the First Layer you will need:
- One bag with thick/outline sky blue and a #2 tip
- One bag with fill/flood sky blue and a #3 tip
- One bag with thick/outline yellow and a #2 tip
- One bag with fill/flood yellow and a #3 tip
- One bag with medium white and a #2 tip
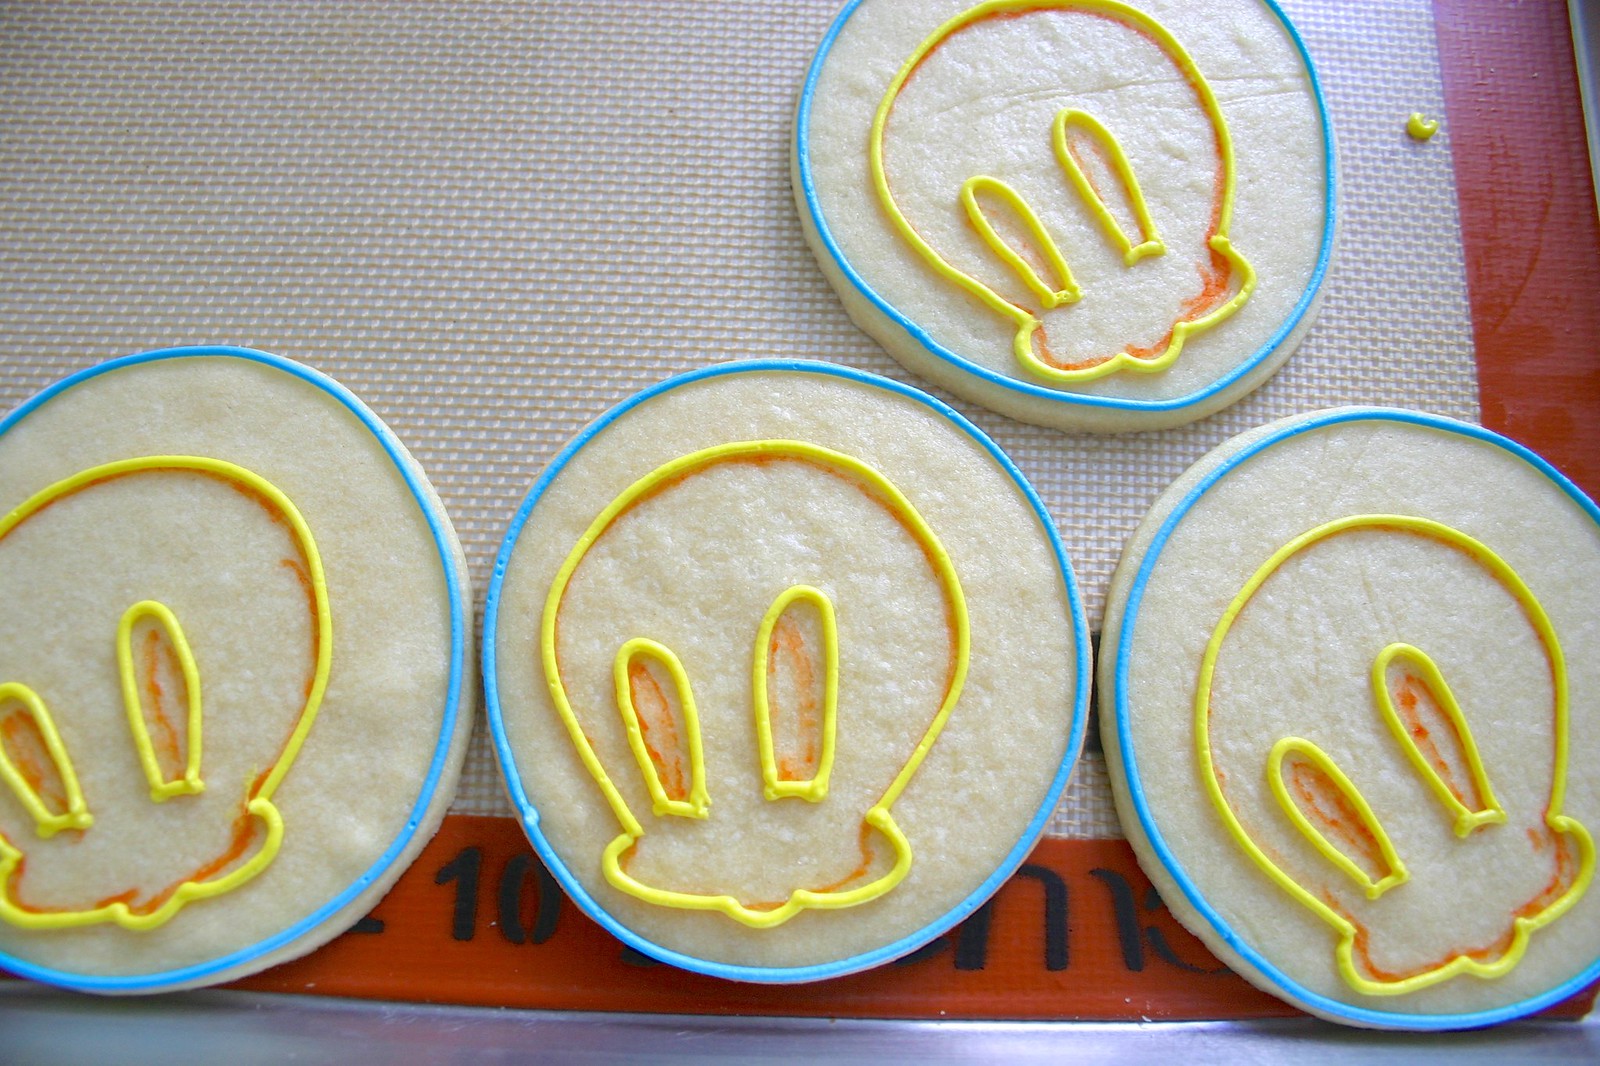
Outline the outside of the cookie with the thick blue. Outline Tweety's features with the thick yellow.
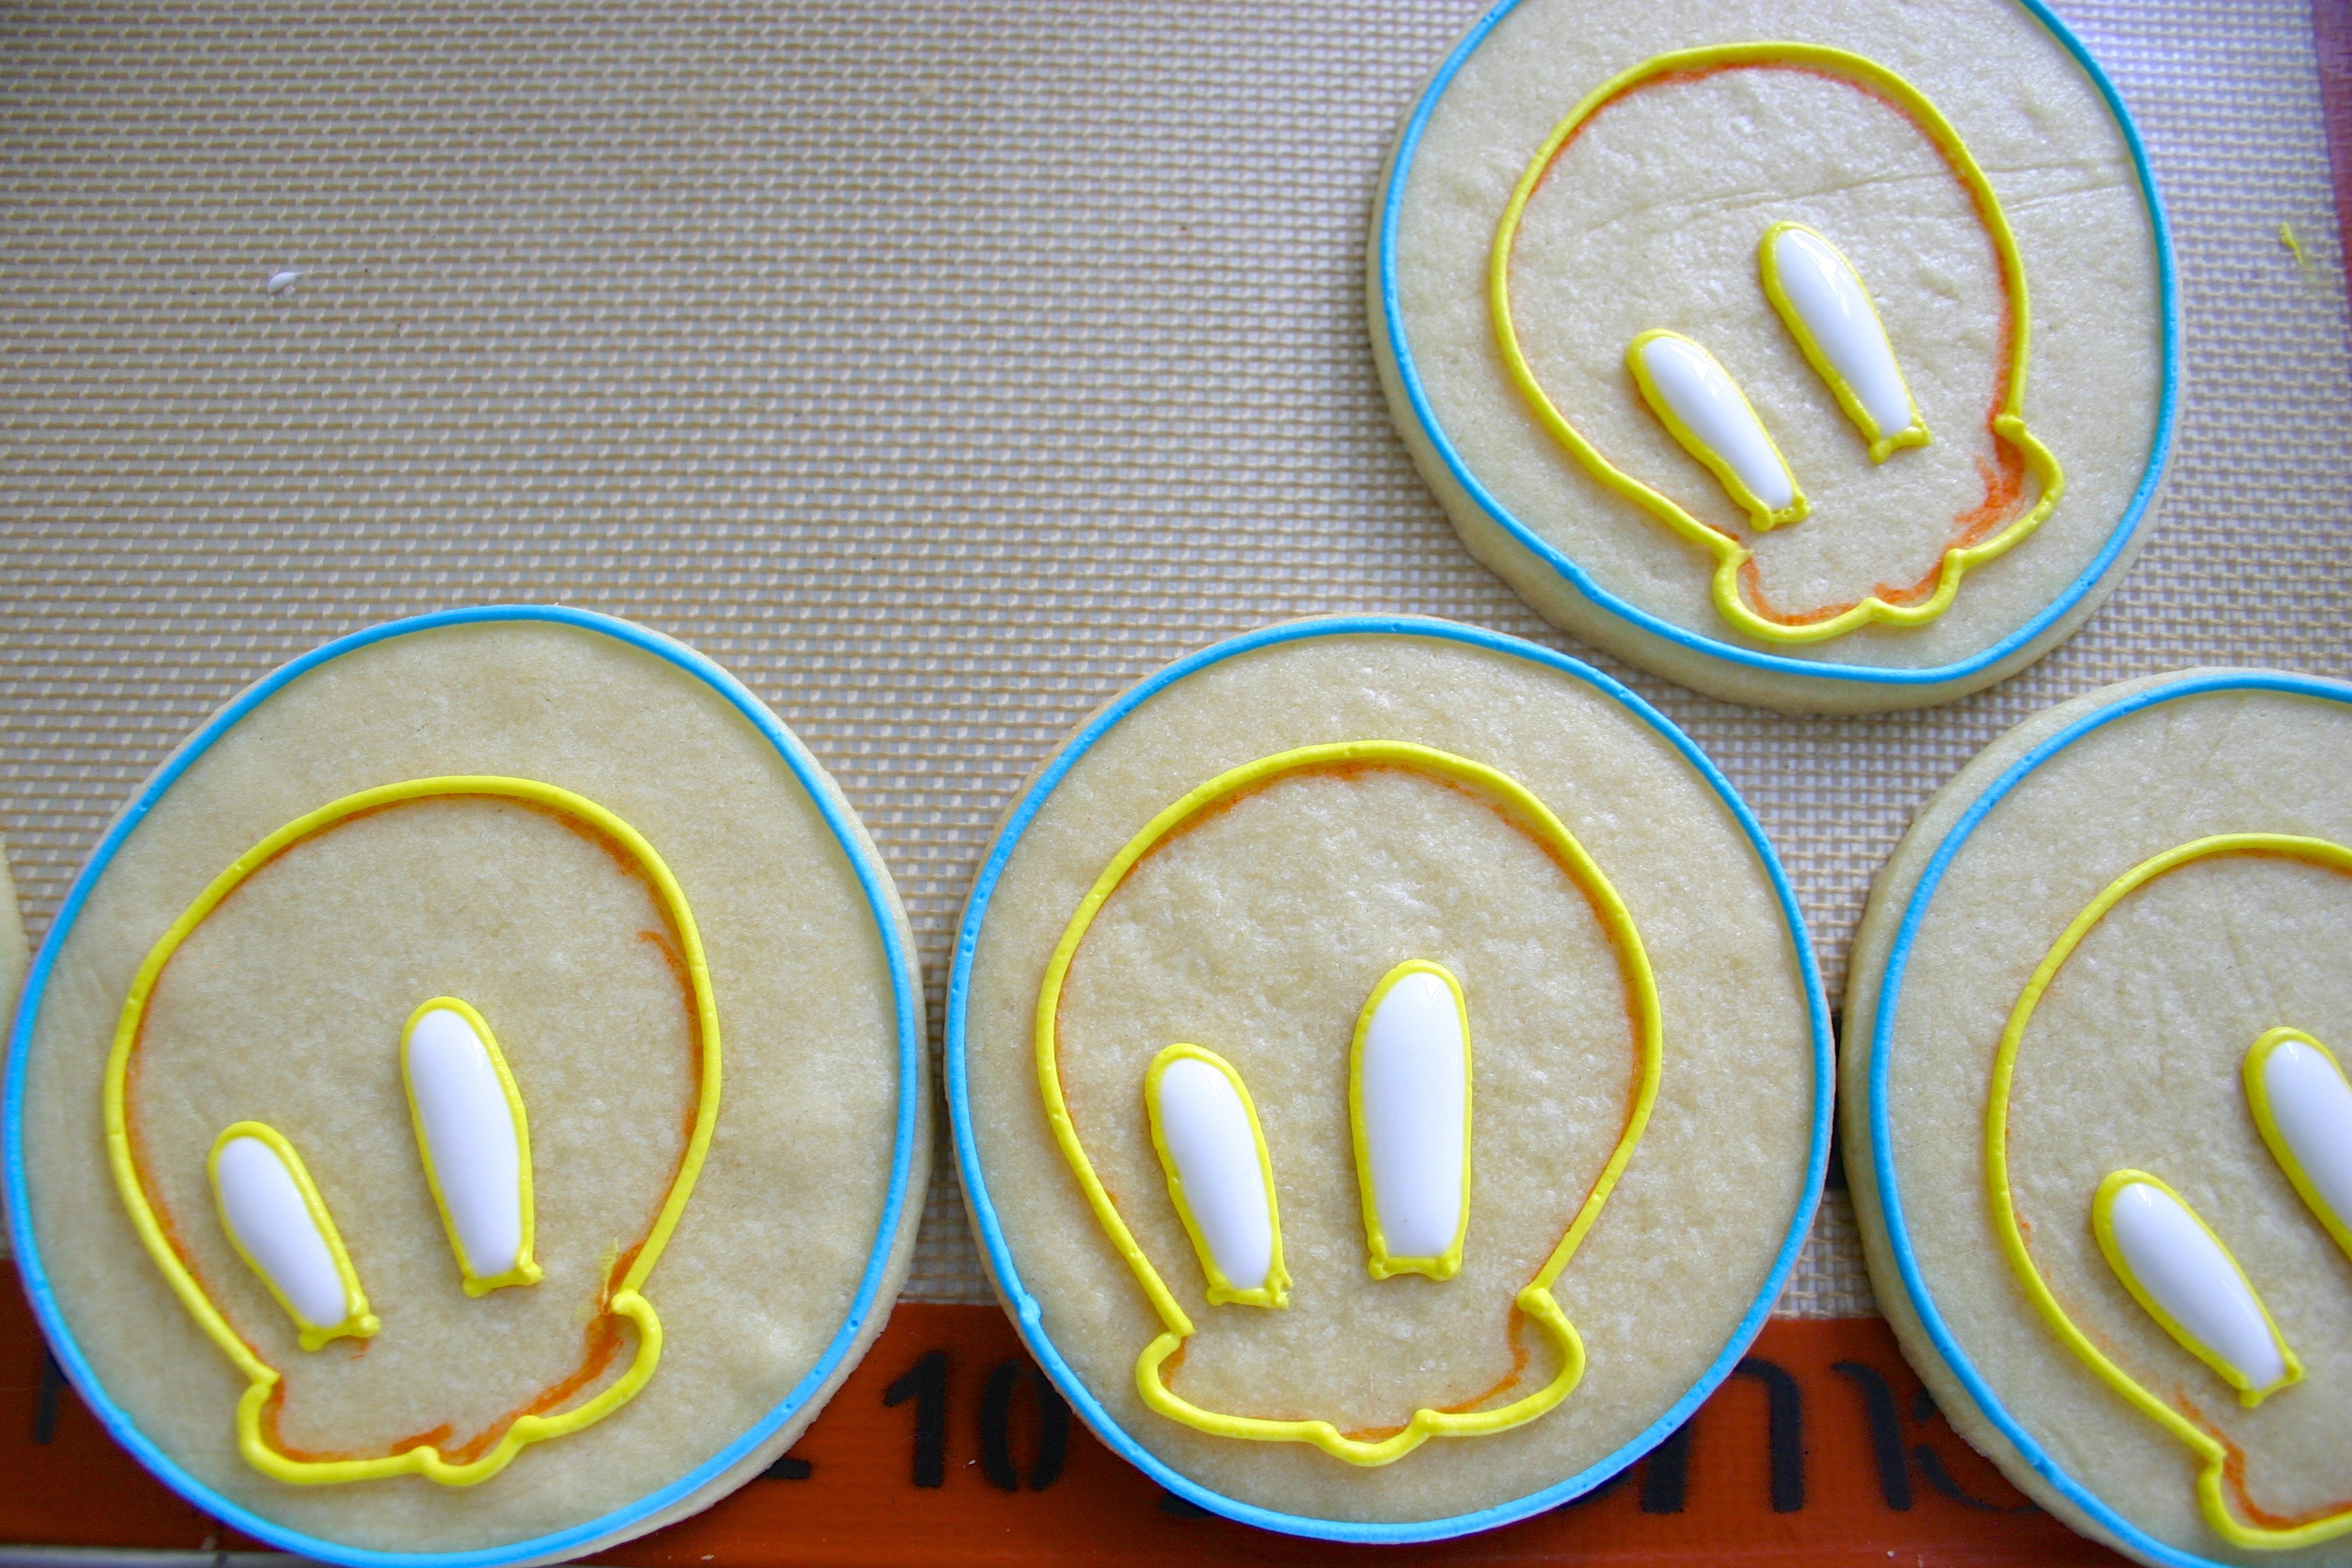
Shortly after you outline, fill the whites of the eyes with the medium white icing. Use a toothpick to make sure the white icing is touching the bottom of the cookie and not just clinging to the yellow lines. If that is the case, you will get little holes in the icing and once it dries to outer layer will "fall," making holes in the outer appearance.
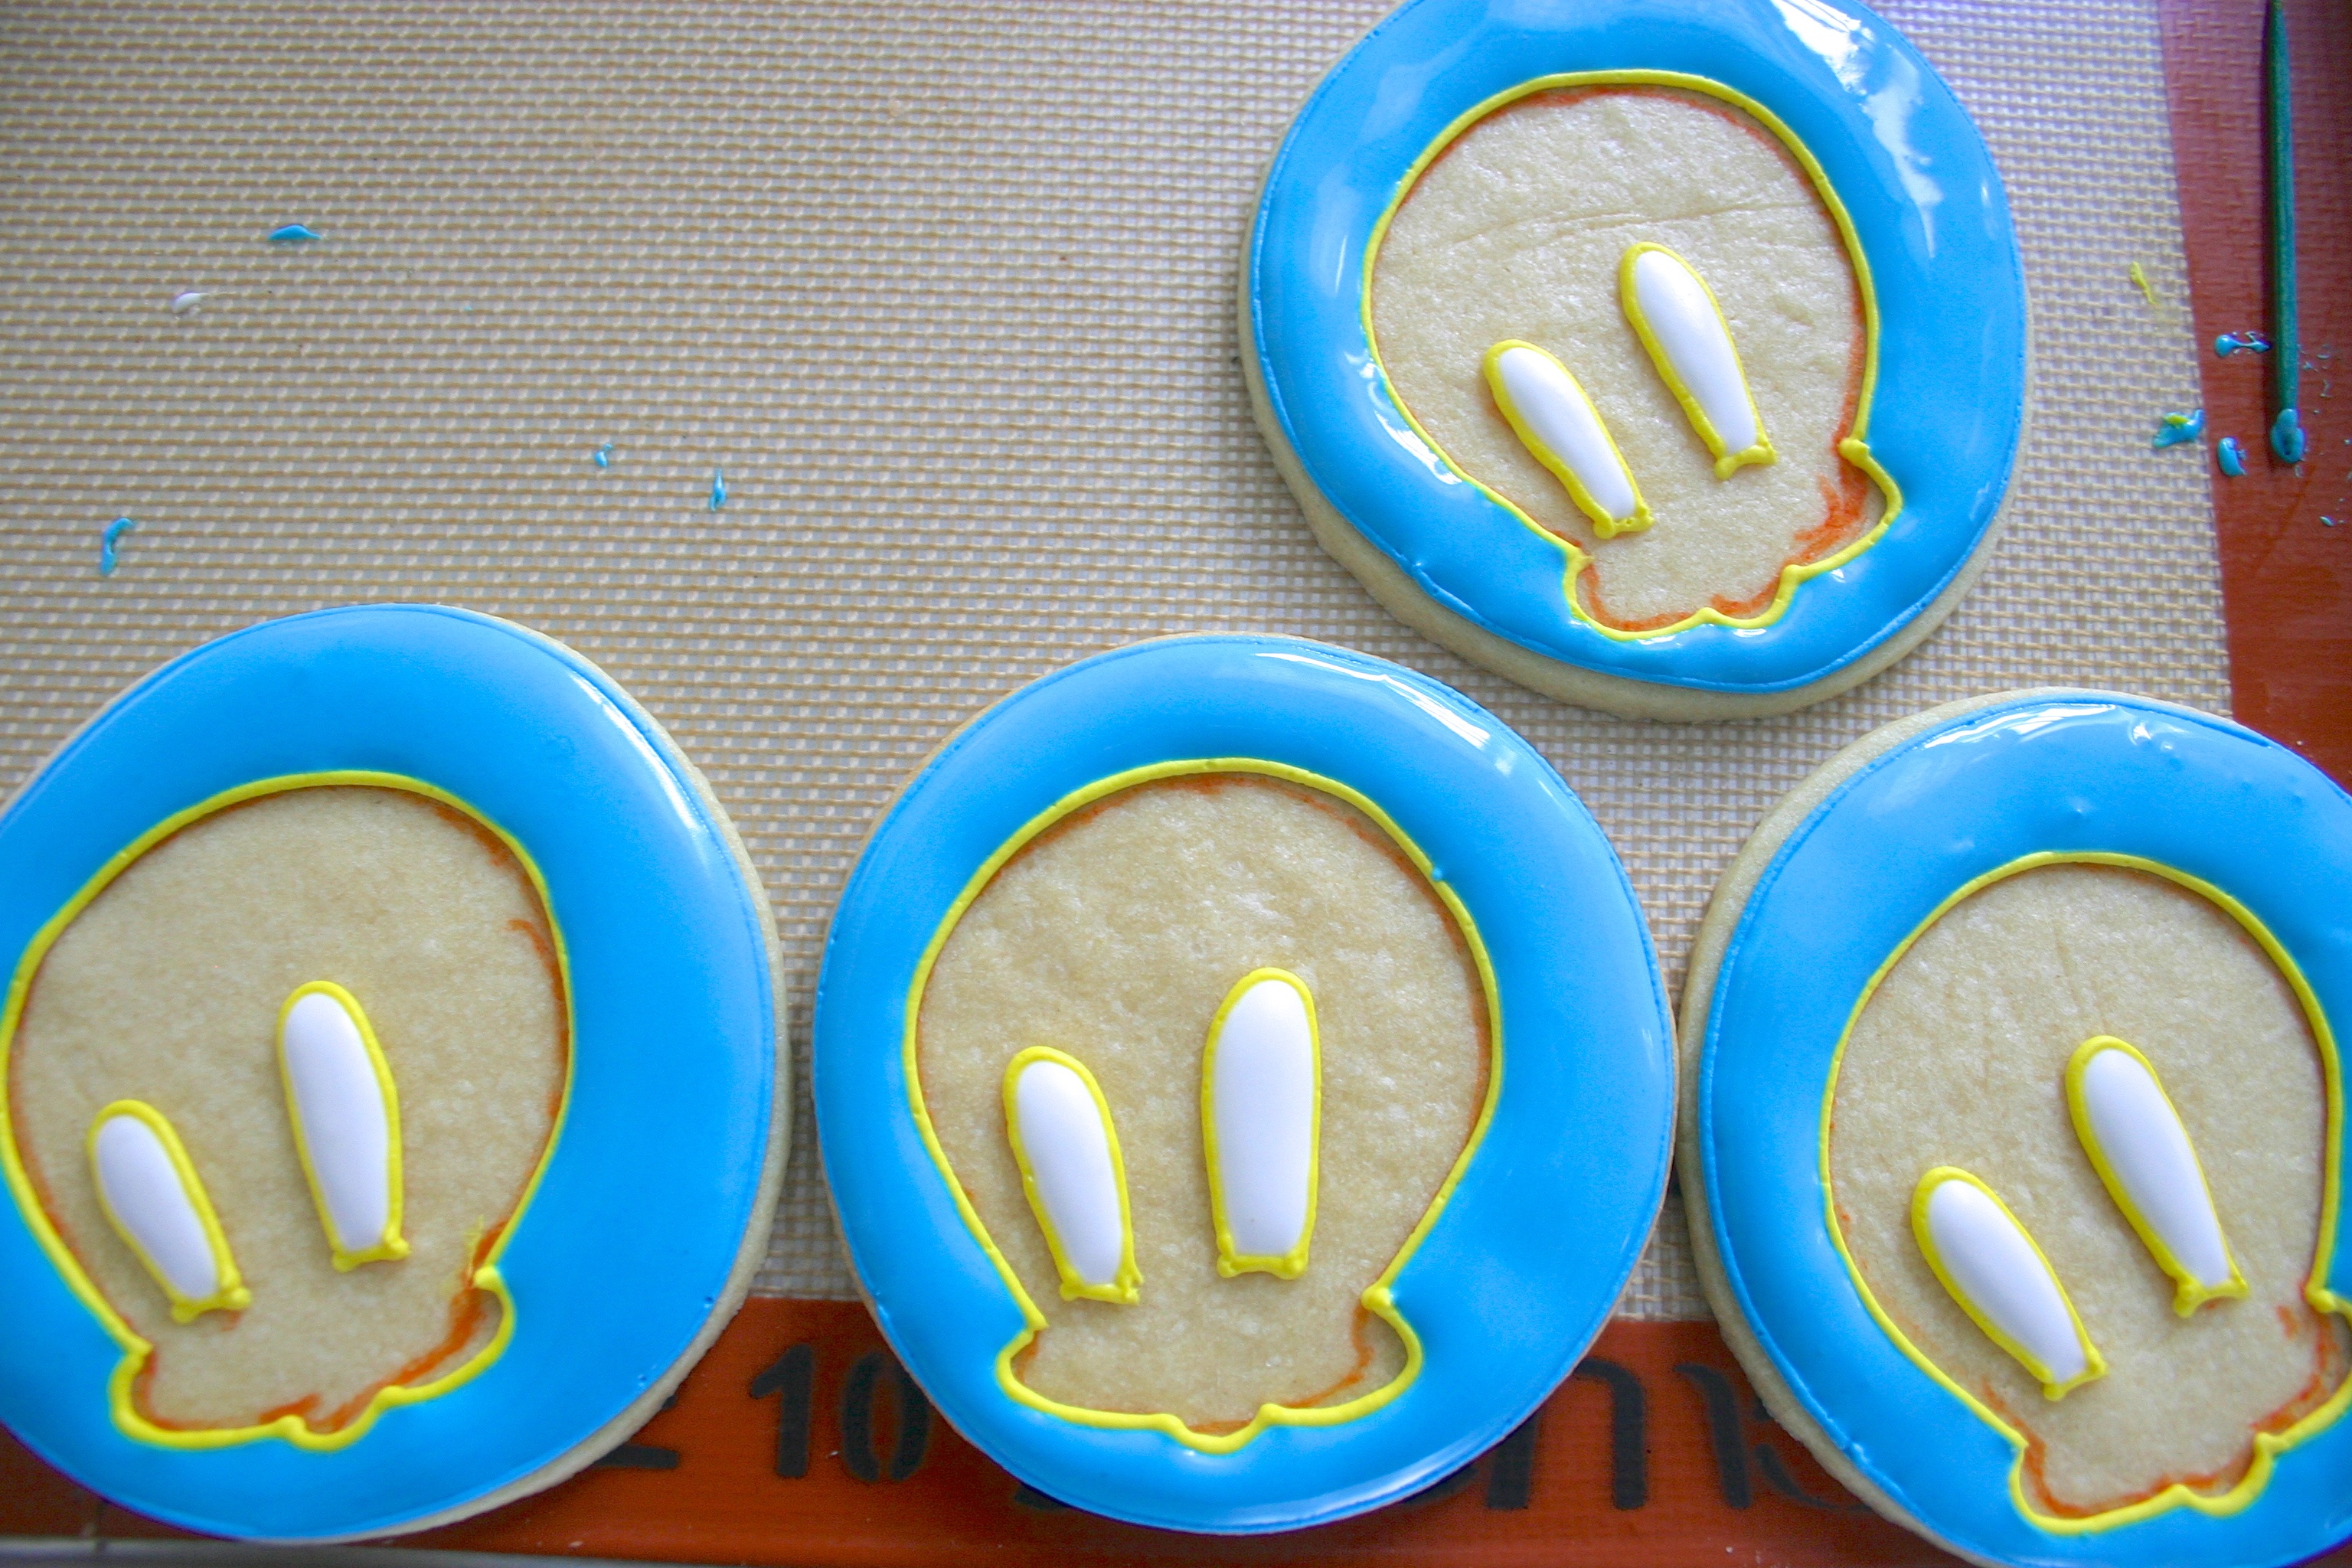
Fill the blue. Allow it to dry slightly before filling the yellow.
Allow this layer to completely dry. Several hours to overnight depending on the temperature and humidity of where you are. Once the cookie is dry, the icing will be smooth and slightly shiny. You will be able to press on it without leaving any marks or dents. If when you lightly touch the surface it feels tacky or sandy, it is not dry yet and needs several more hours. If you decorate it too soon you can damage that layer or you can have color bleeding, especially with black icing going on top.
For the Second Layer you will need:
- One bag with thick/outline black with a #1 tip and a #2 tip on hand
- One bag with fill/flood orange and a #1 tip
- One bag with fill/flood blue and a #1 tip
- One bag with thick white and a #1 tip
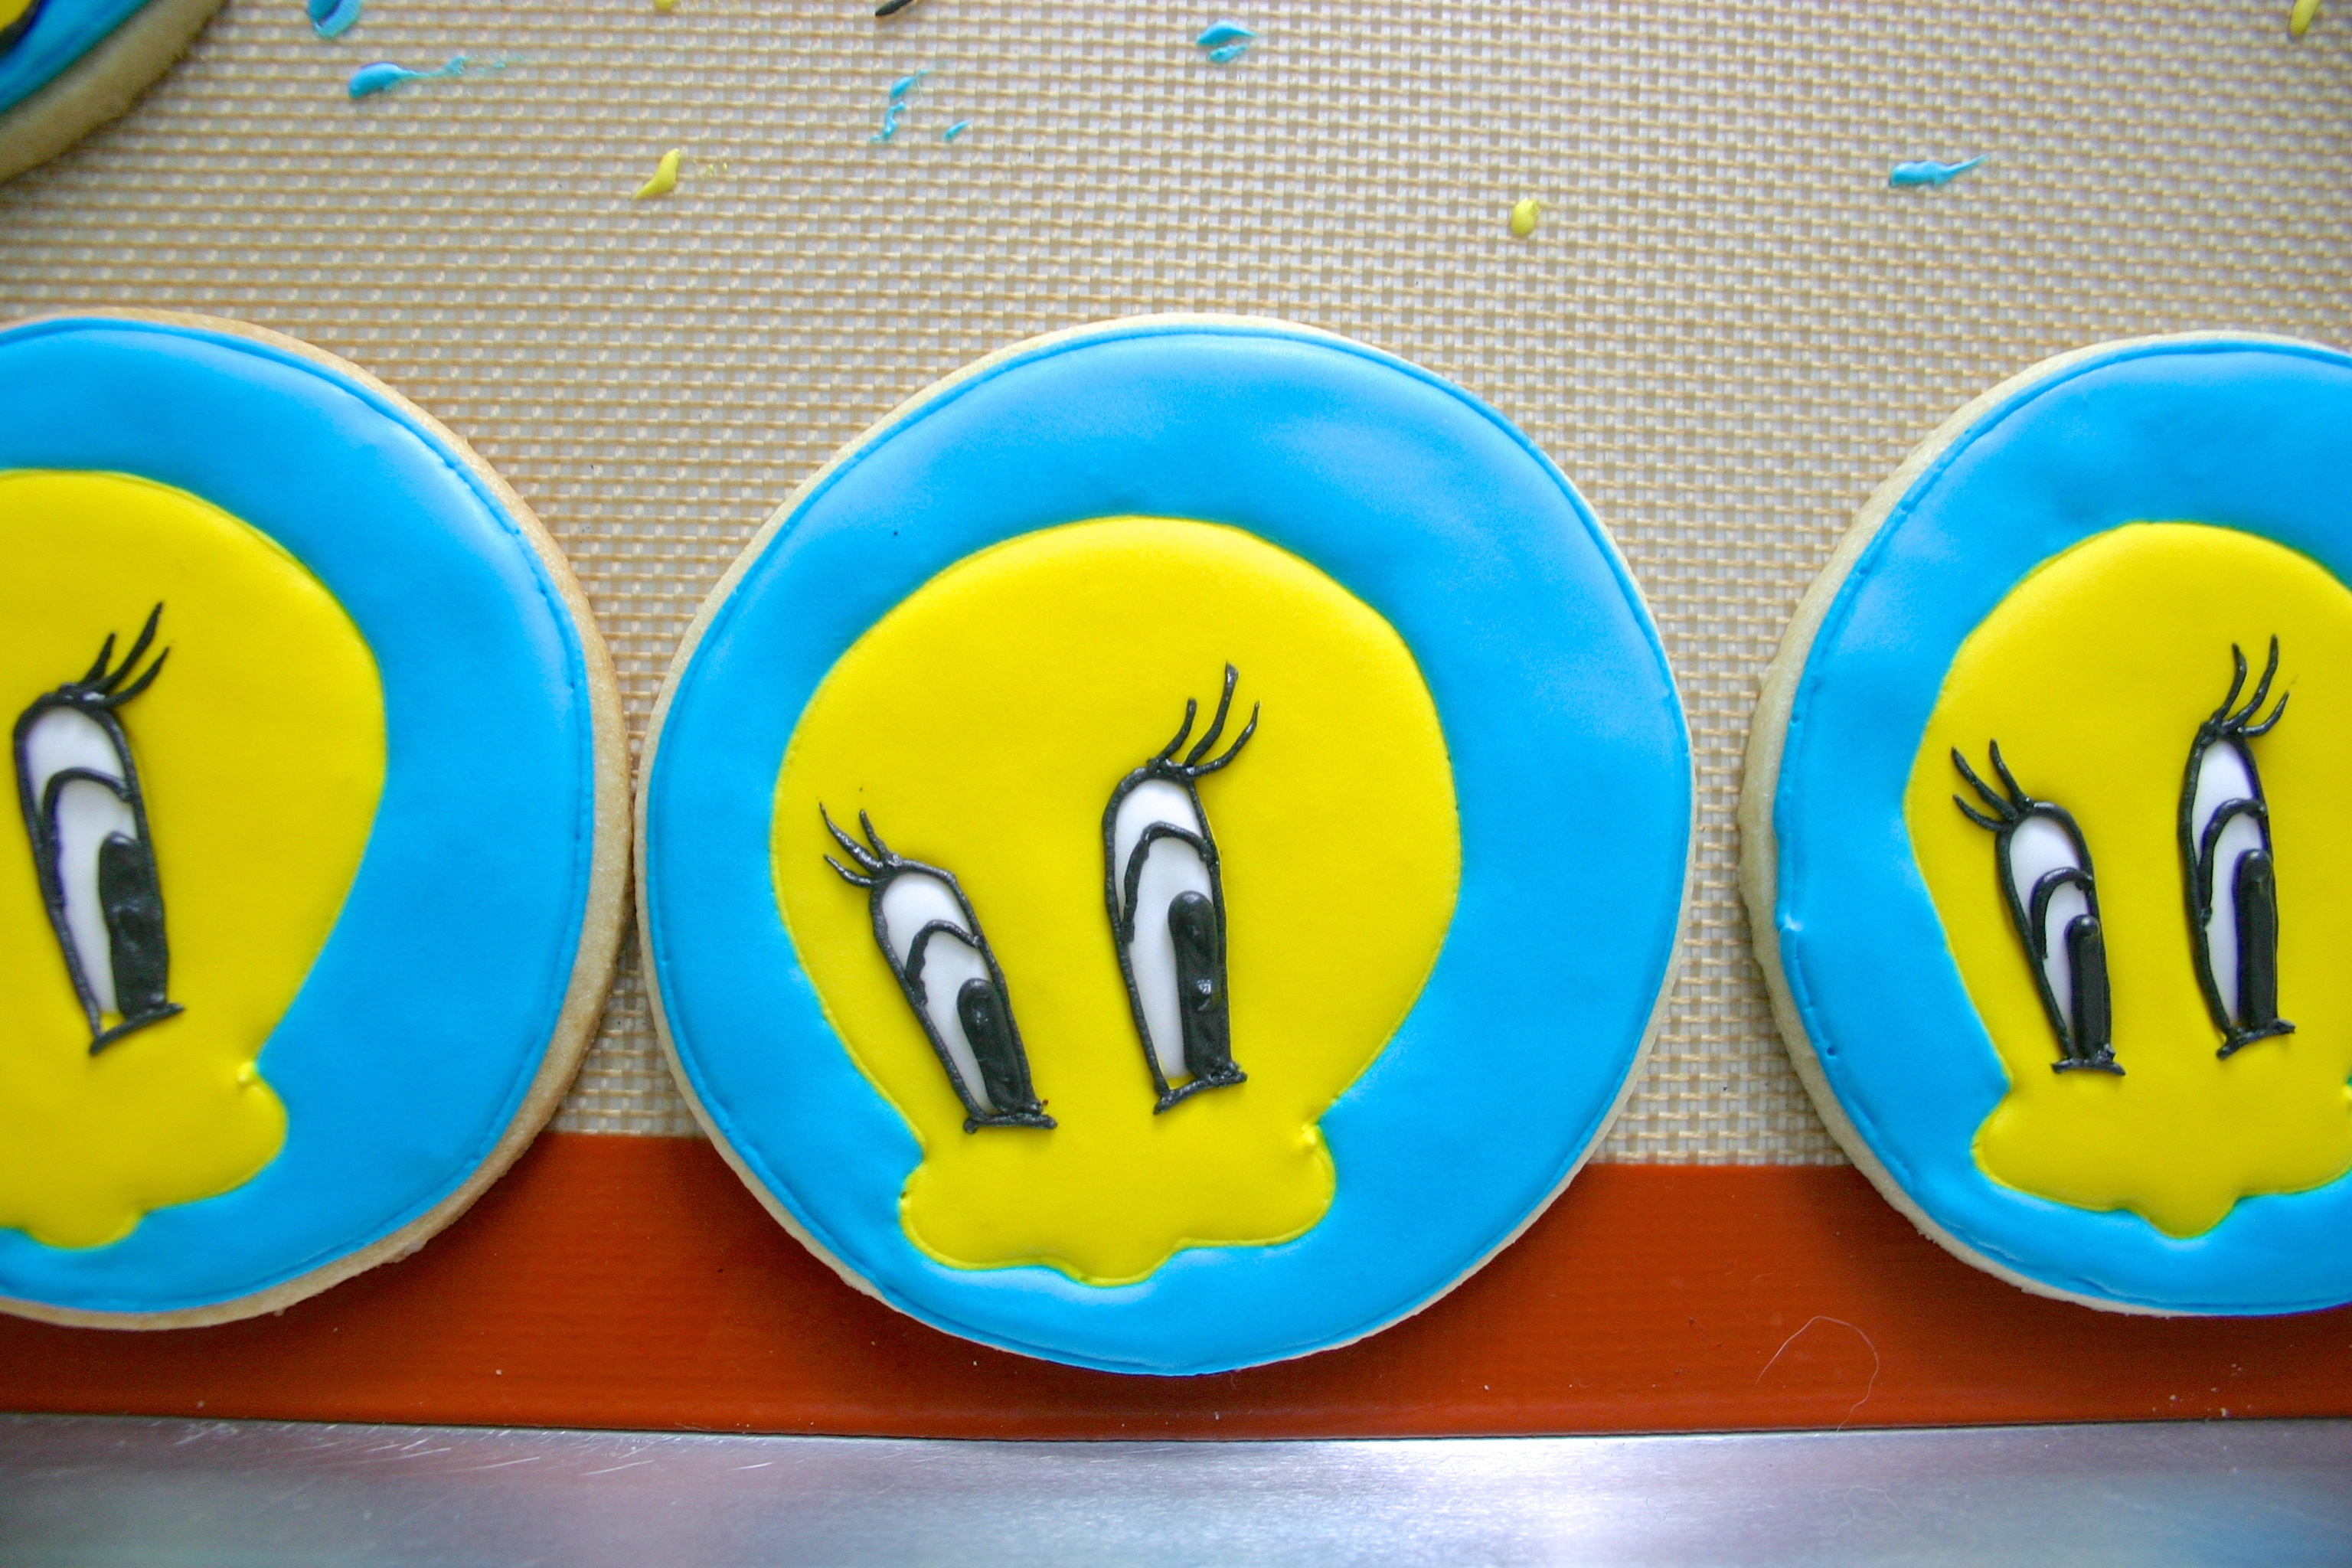
At this point you need to give your character its' defining features. Always have a picture reference. For Tweety I started with his eyes. Outline with the black with the #1 tip. When you do the pupils switch to a #2, then back to a #1 for the rest of the cookie.

Next I outlined his beak. You can draw it on first if you need to. I just used the photo and copied it in icing.
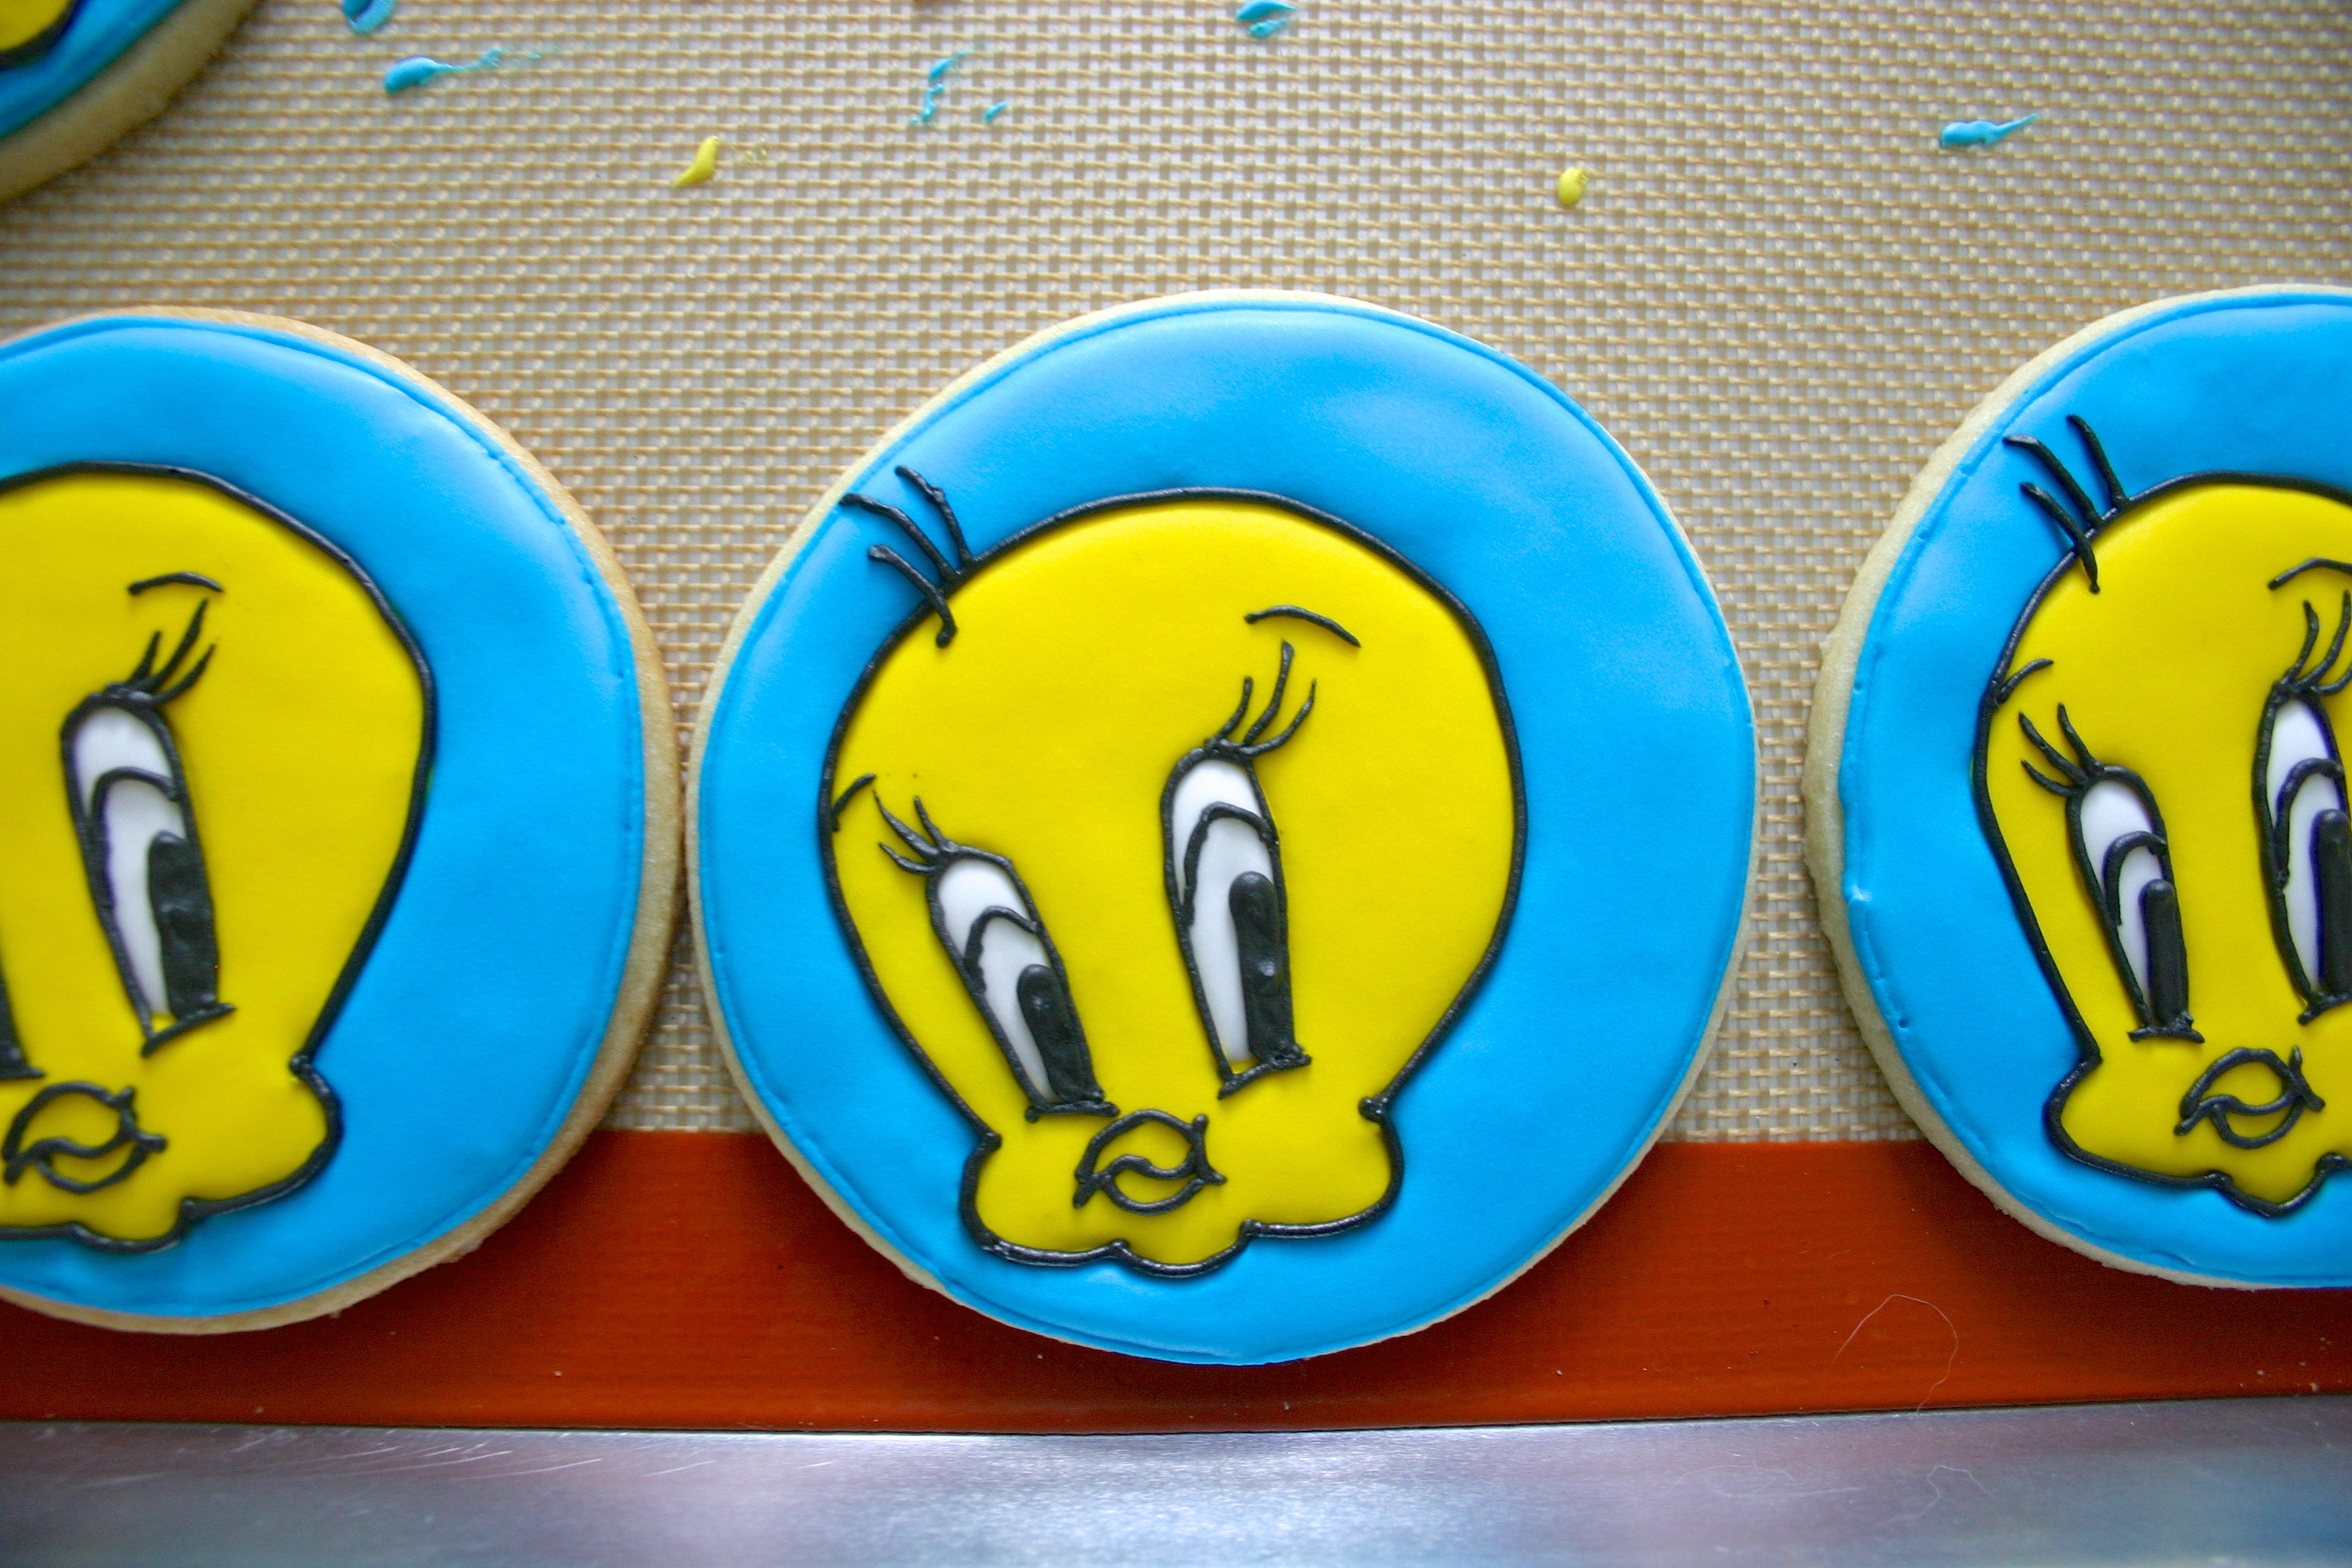
Outline the head, give him eyebrows, and hair (is that hair? feathers?). Then the outlining is complete! Thick icing dries pretty quickly, so you only need to give it 1/2 hour to 1 hour to dry.
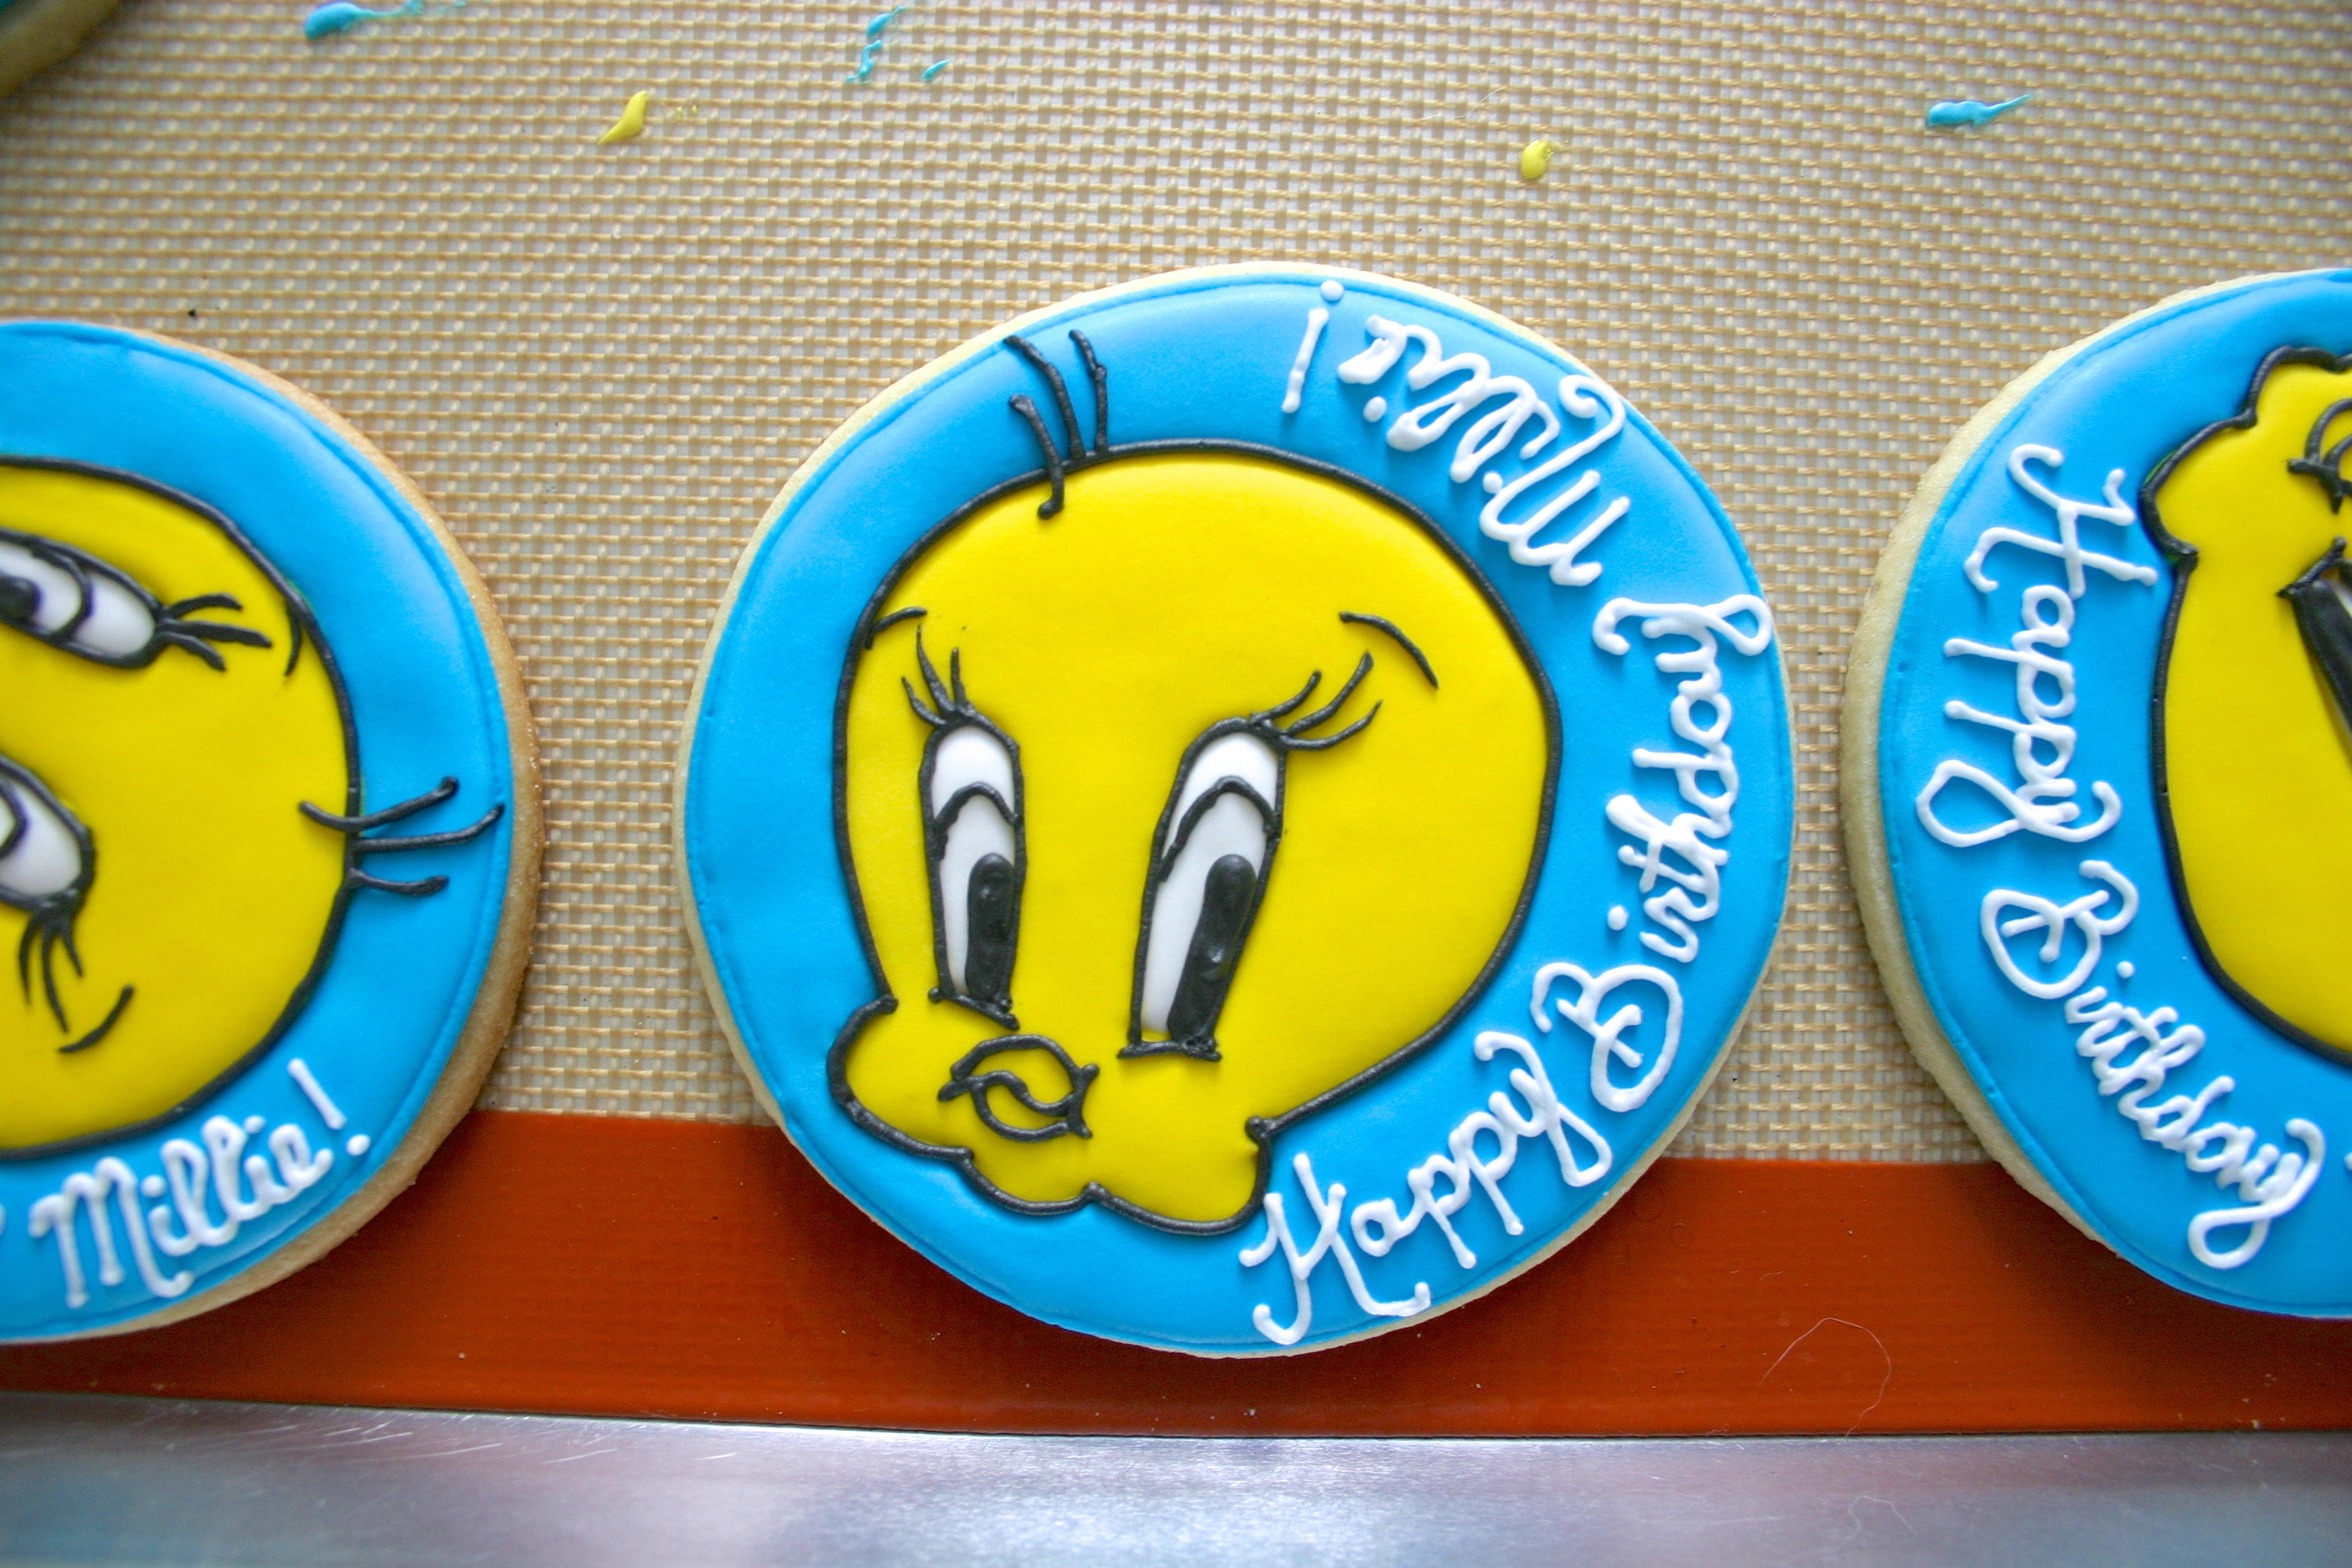
While the black is drying I did the white writing.
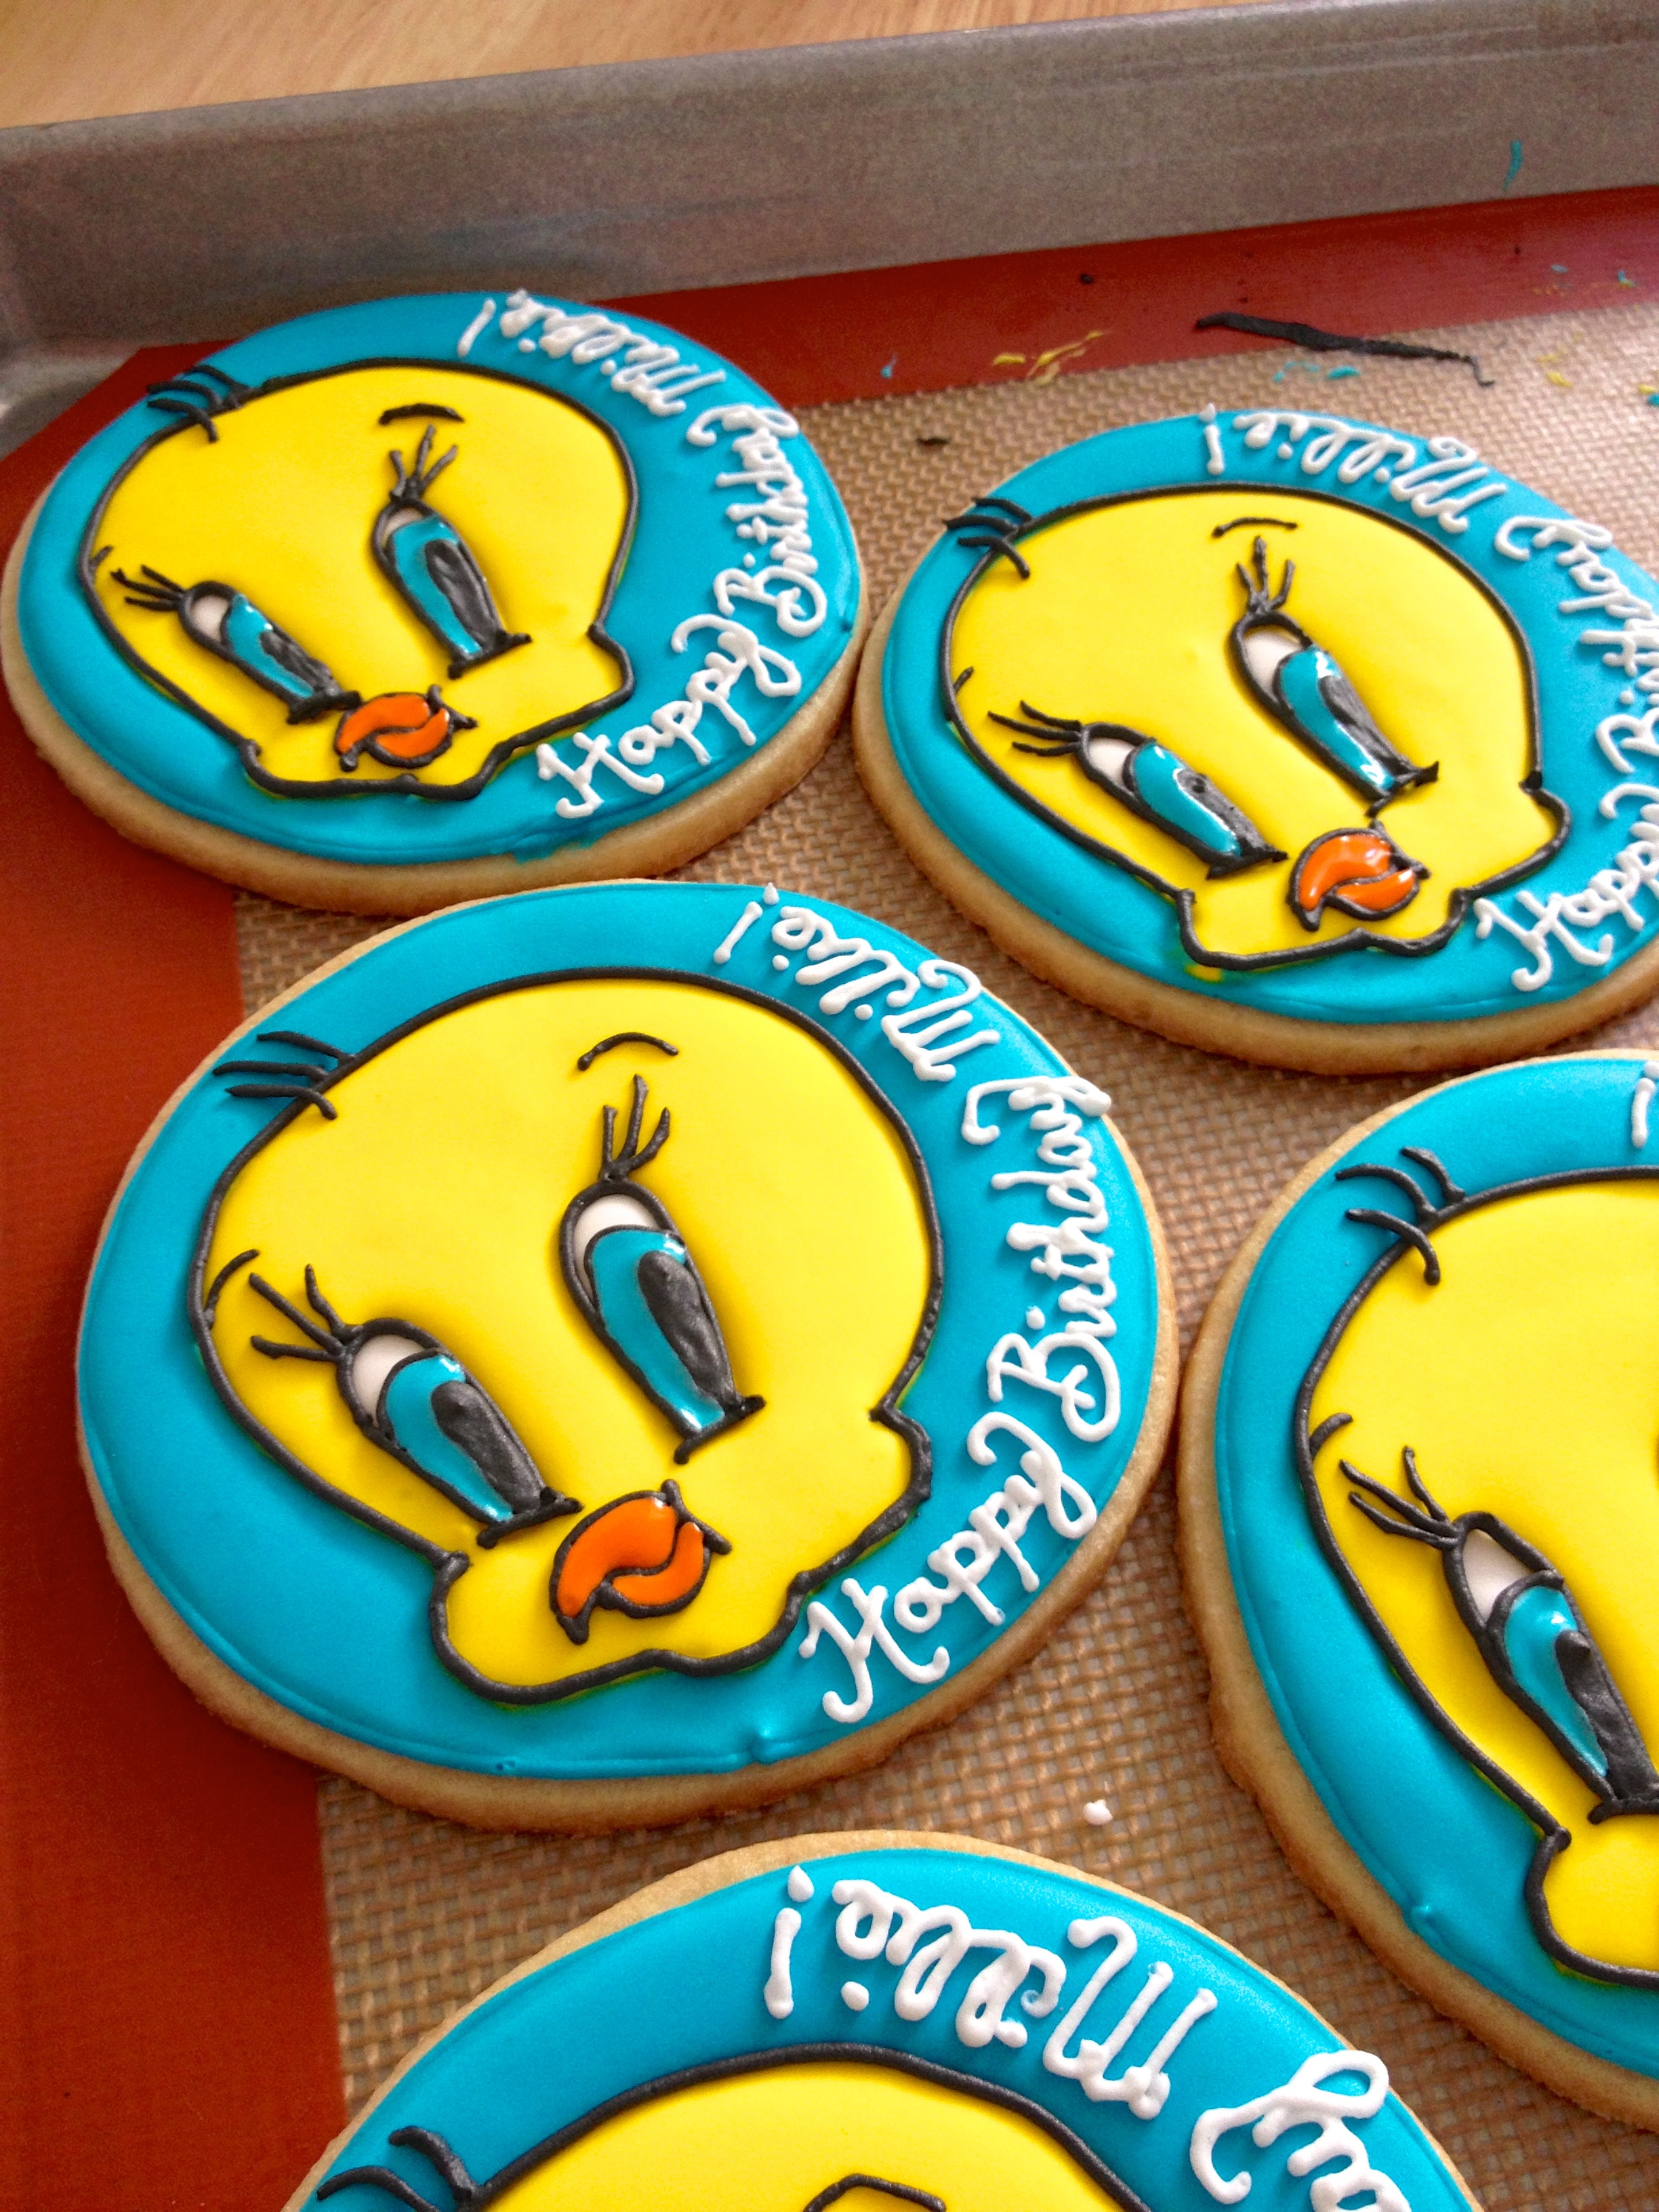
Fill the beak and the irises. Use a toothpick to make sure the icing is filling the space like with the whites of the eyes.
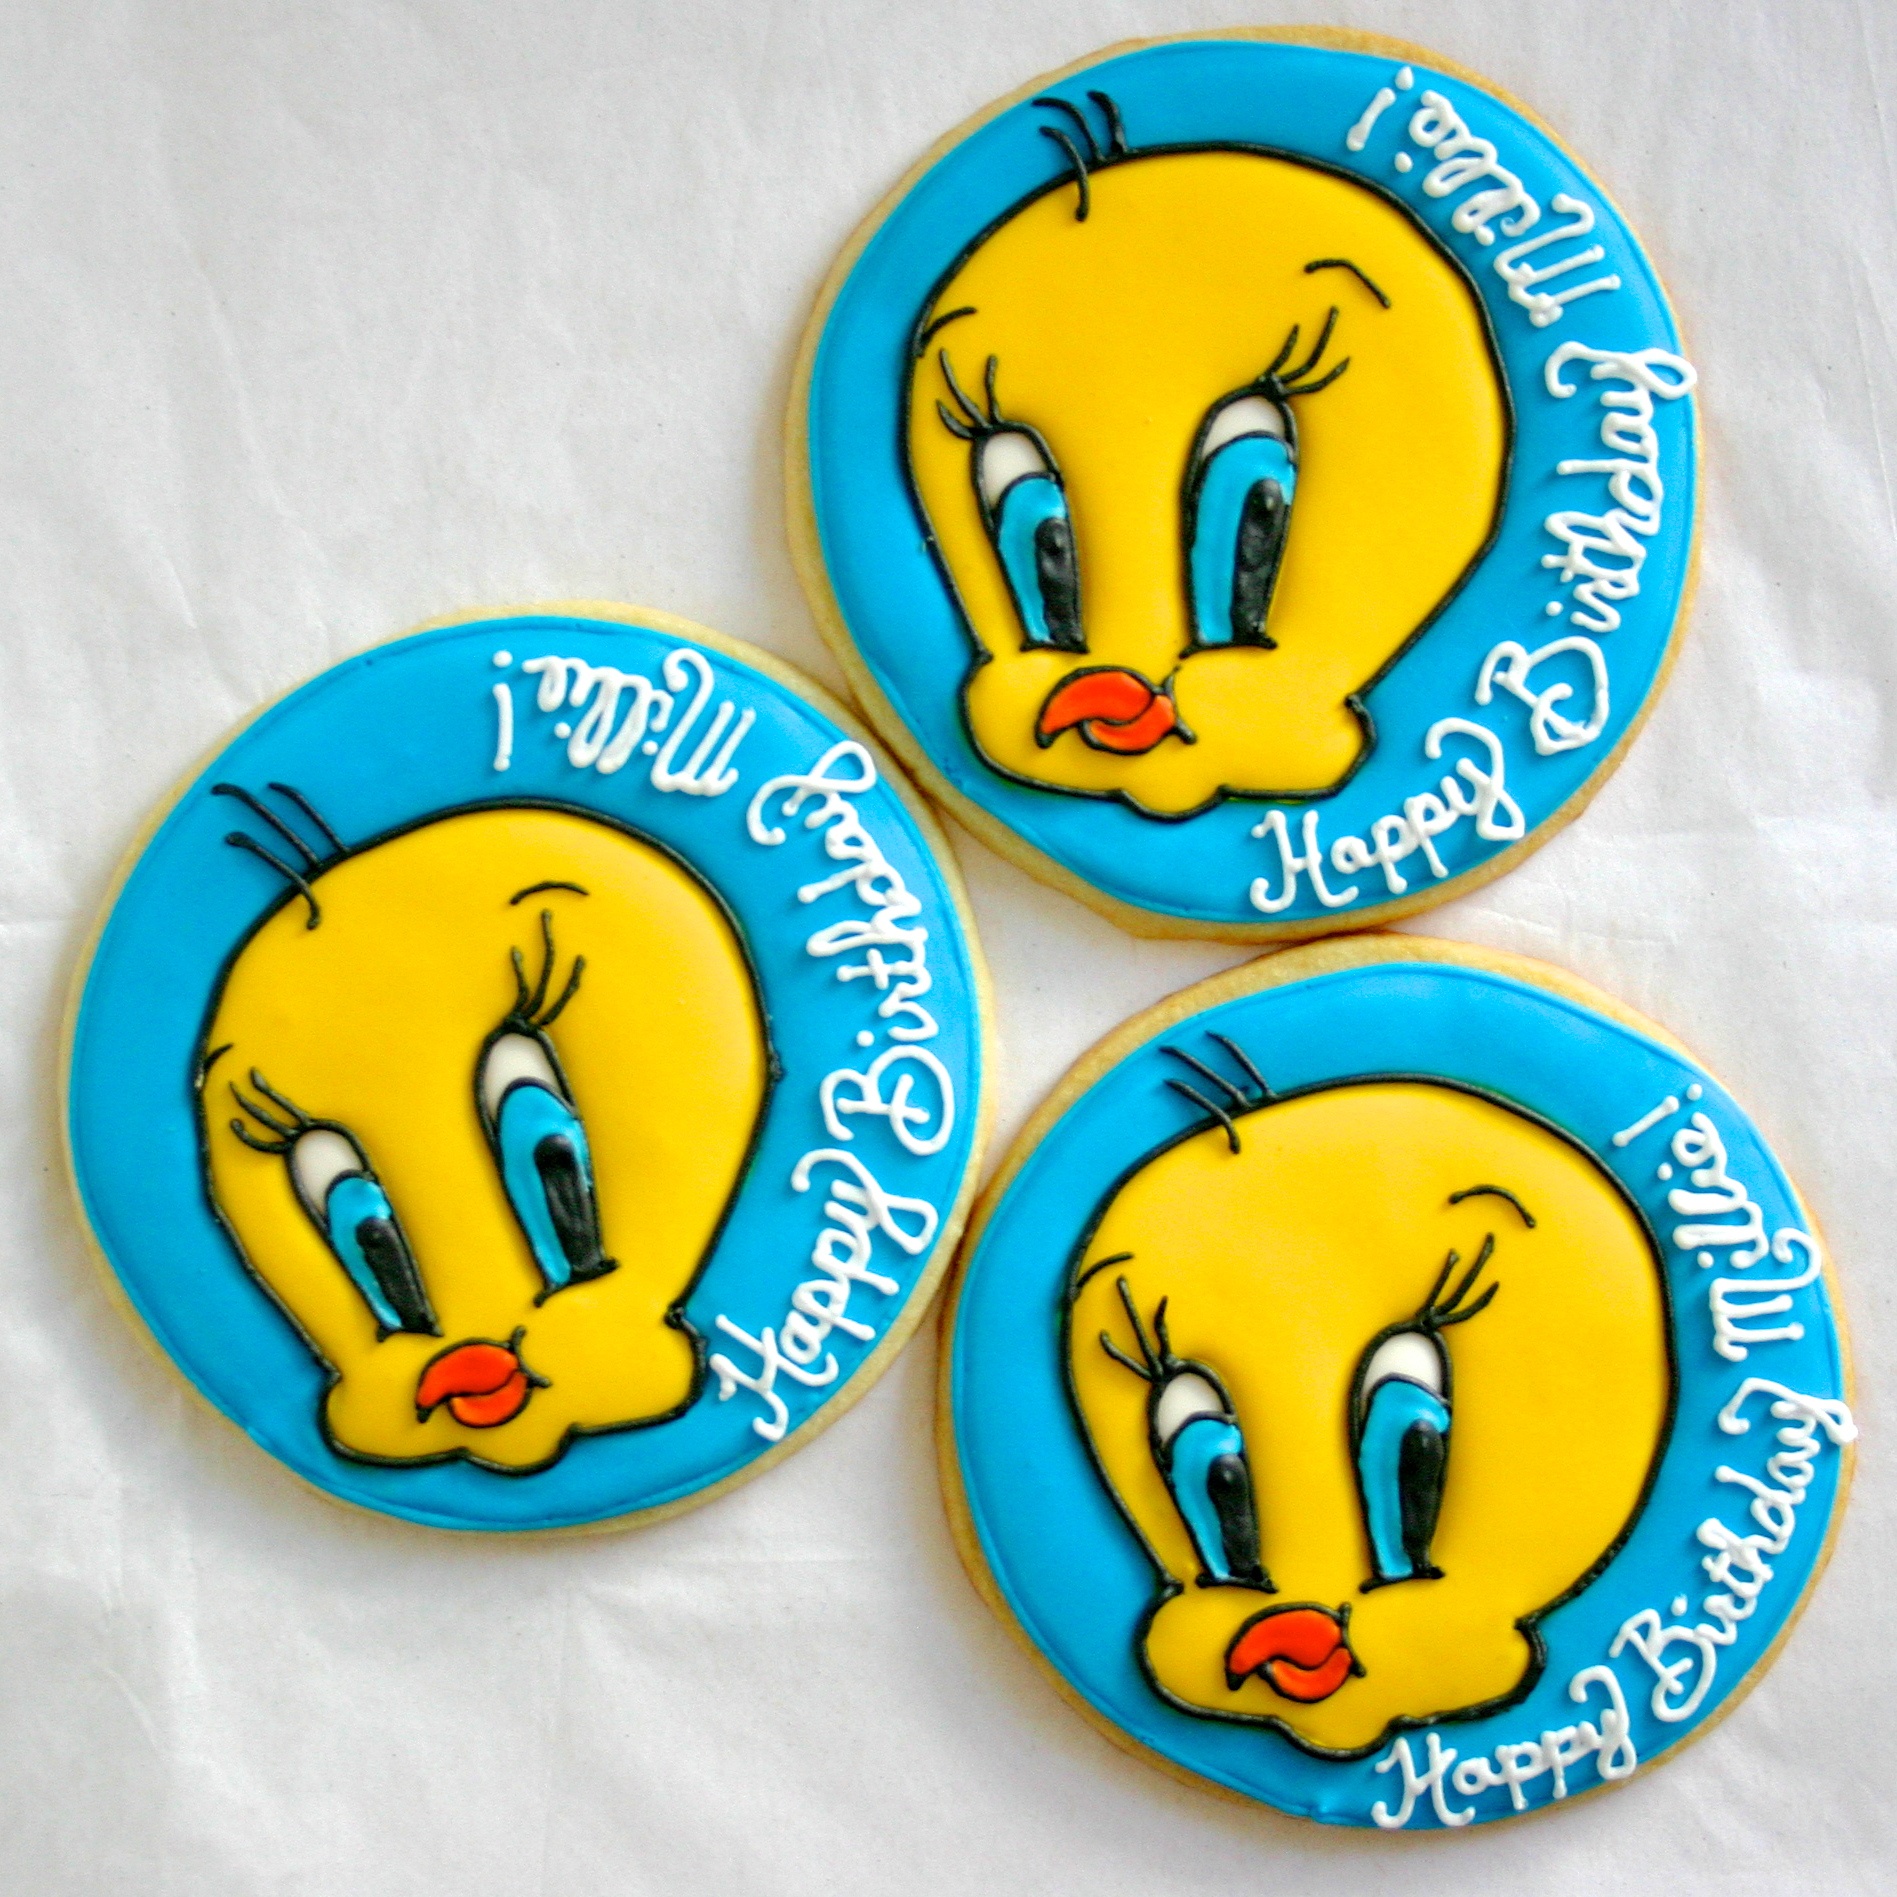
Let the cookies completely dry until handling again.
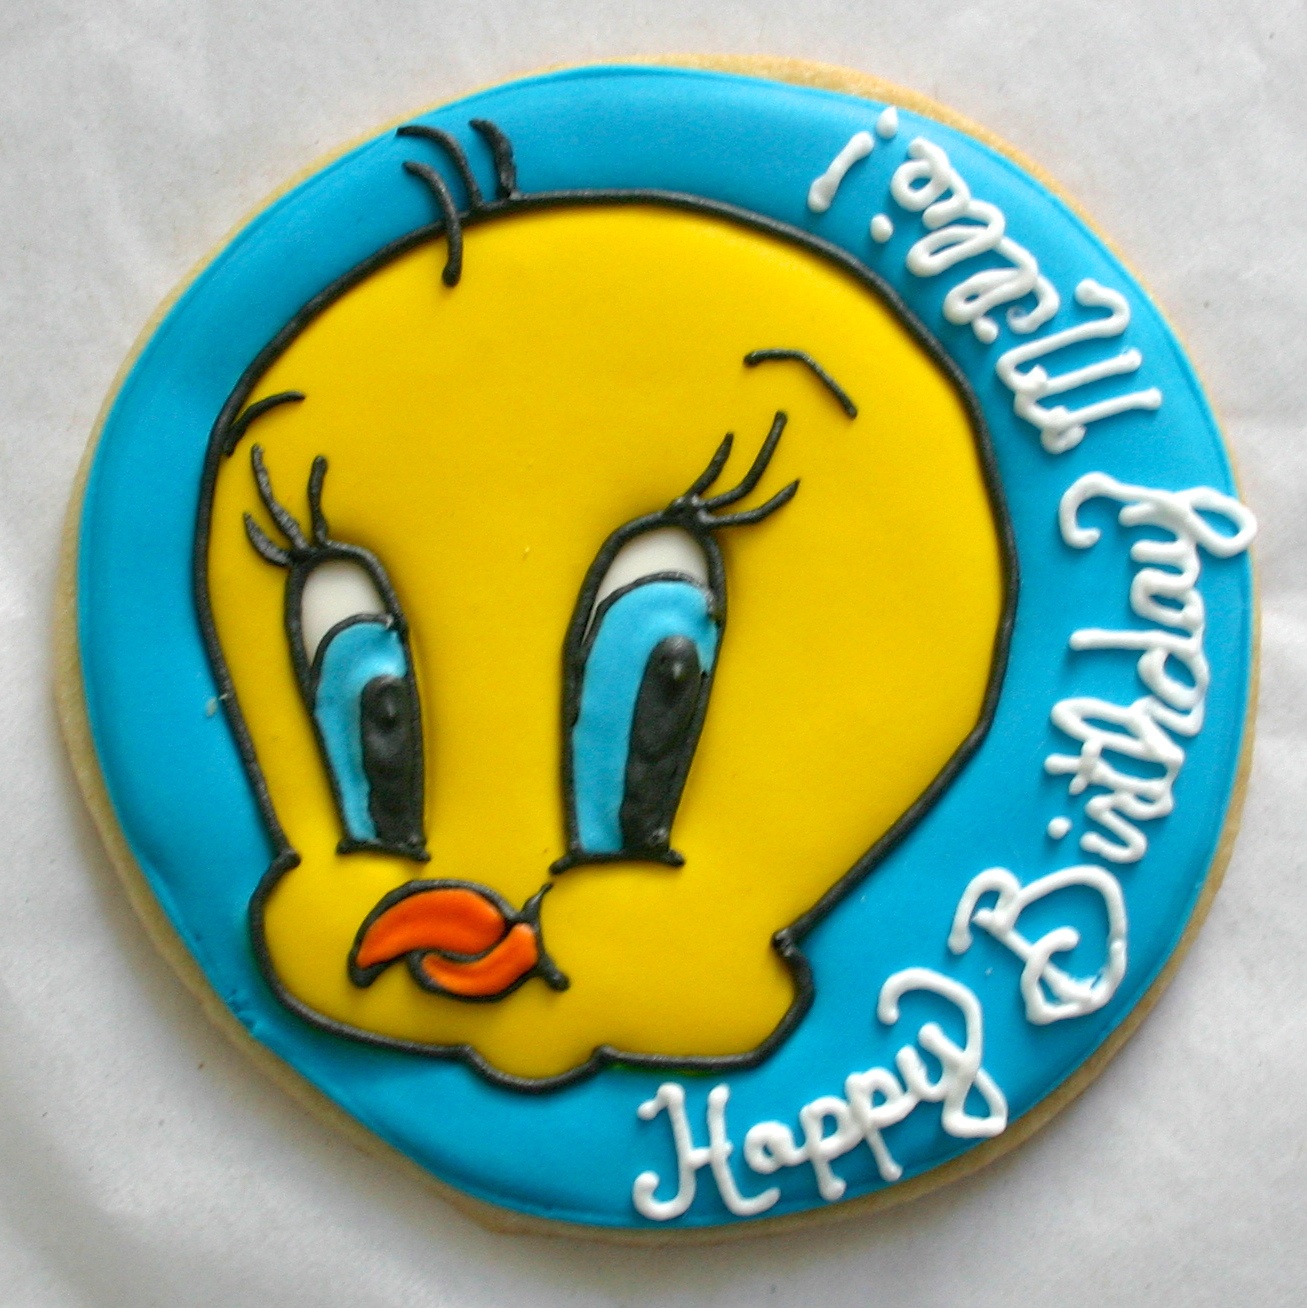
And there you have it! Like I said, you just need to practice and learn to see how to incorporate all the layers. Of course you can also do this cookie completely flushed with the beak and insides of the eyes inset in the first layer, but this way is my personal preference.
And if anyone ever needs any decorating help, just leave a comment and I'd be glad to help with any project you have!
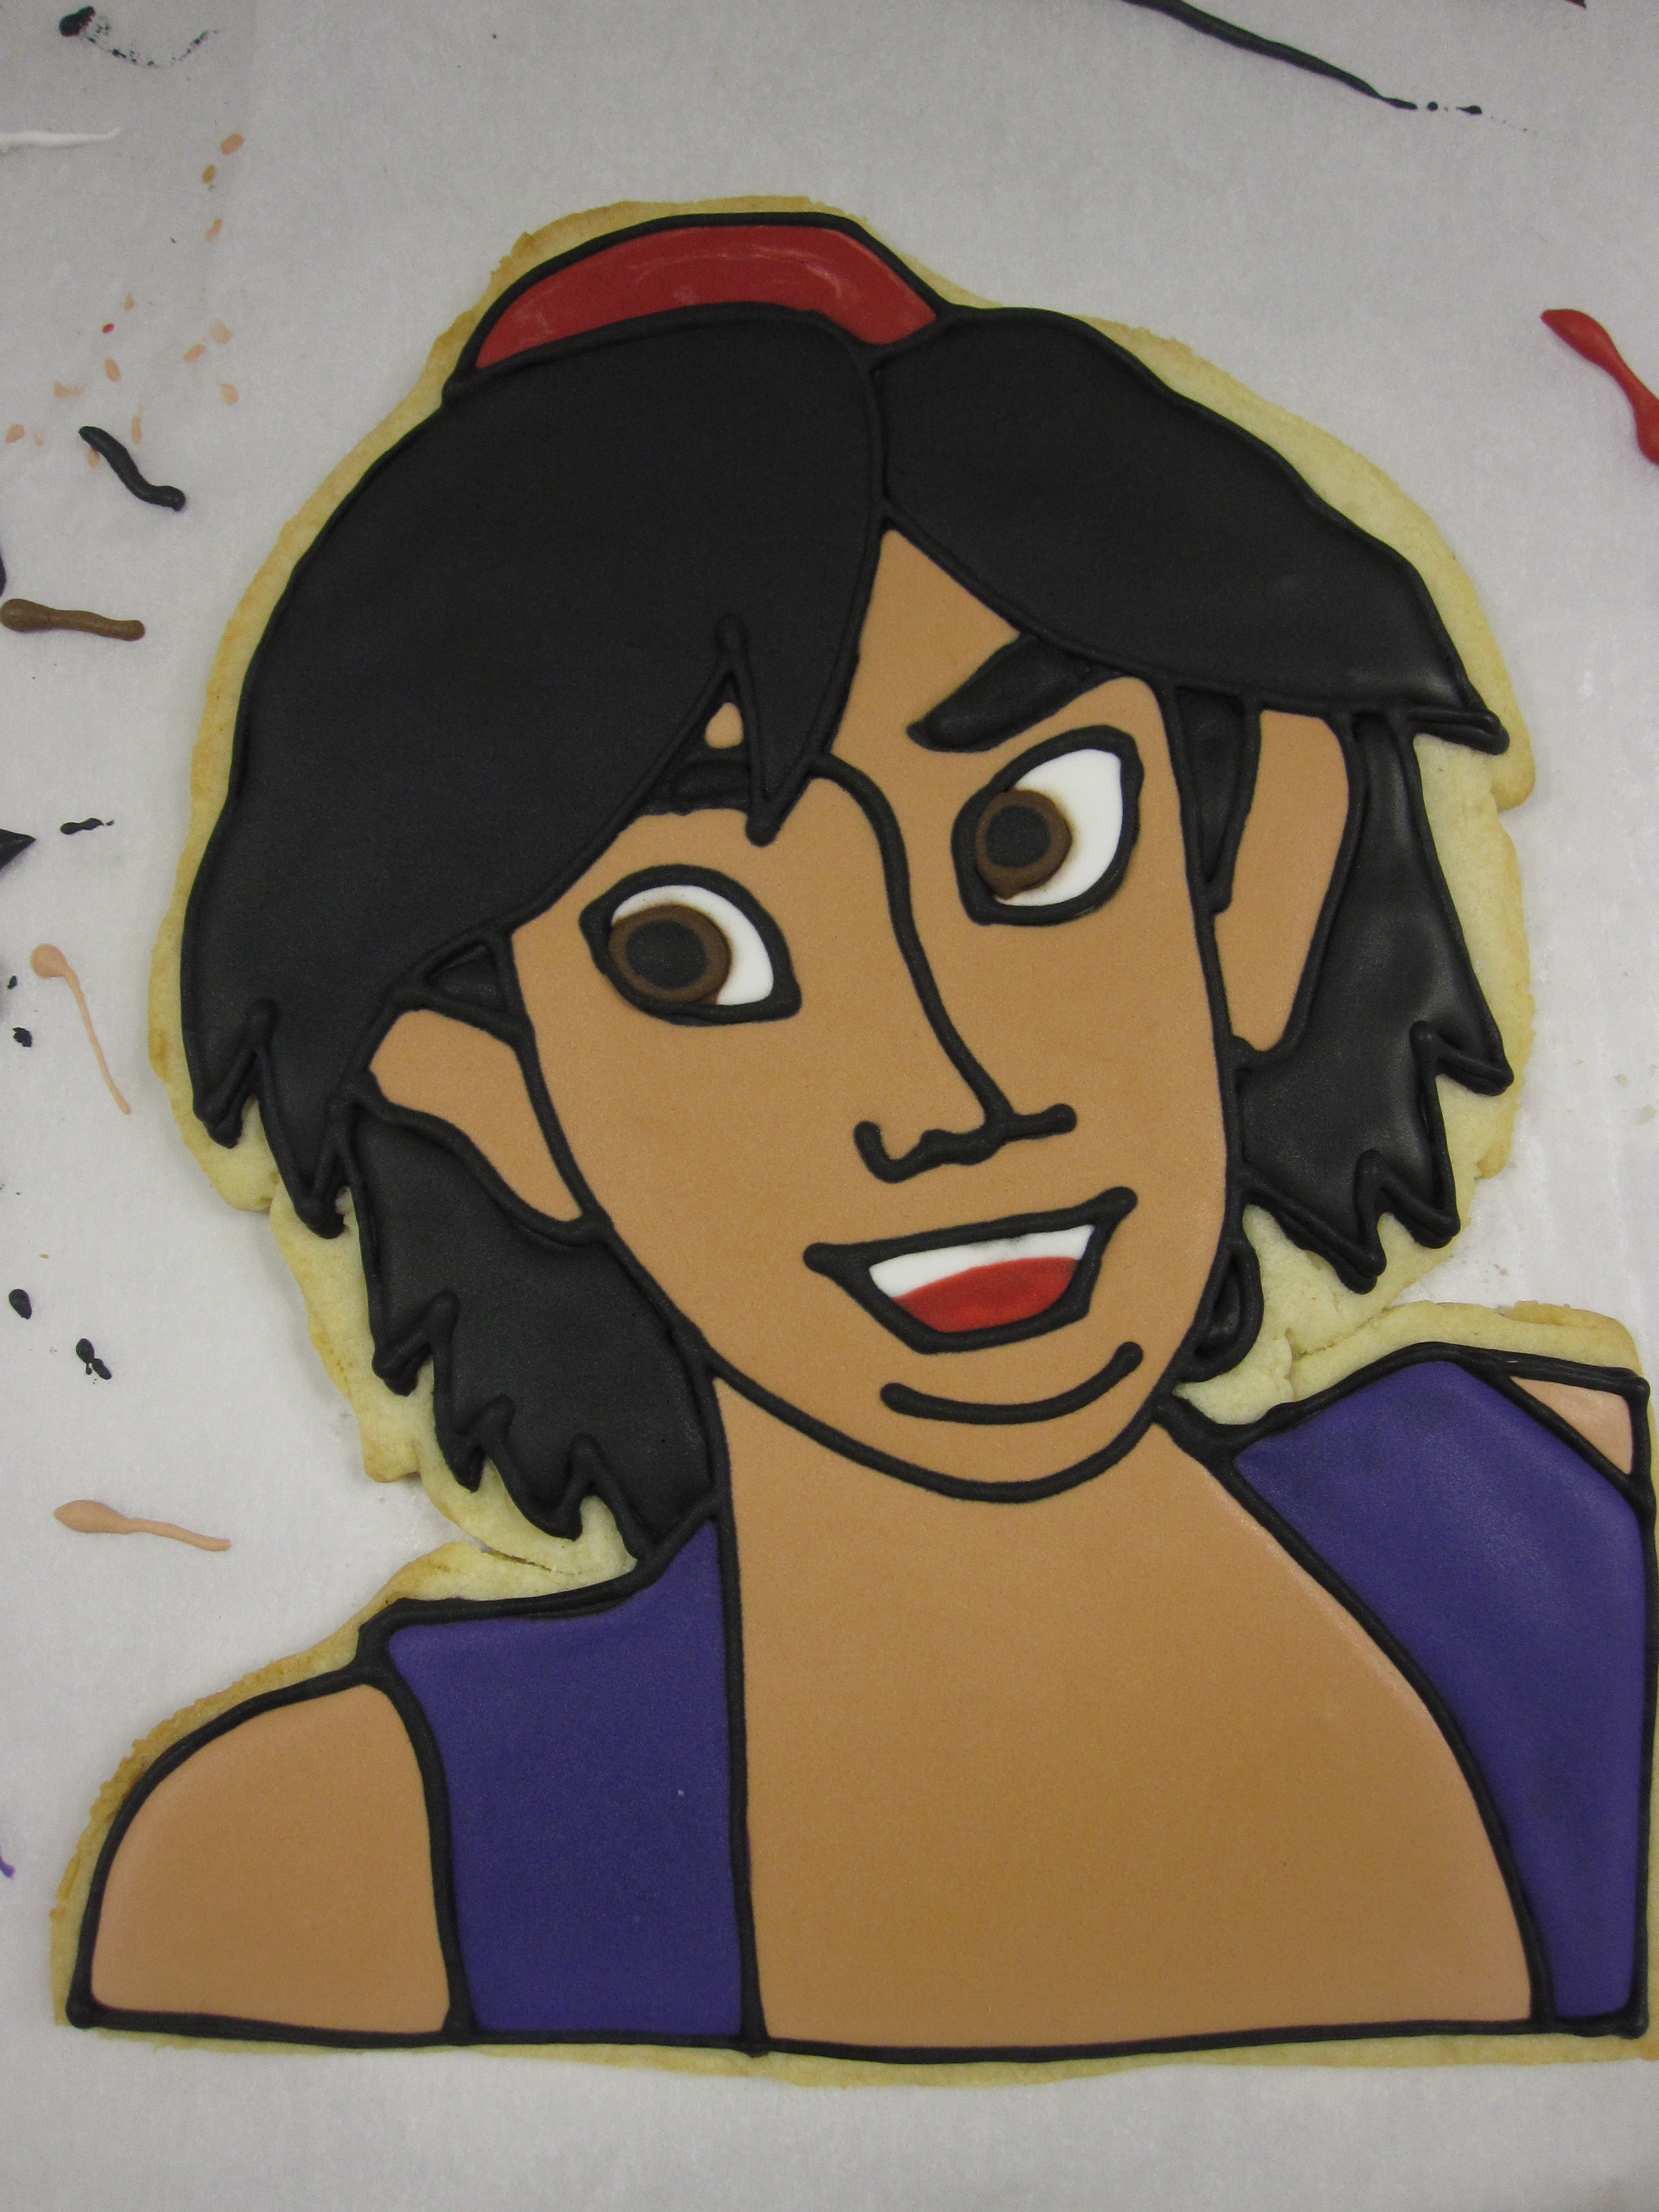
Here are some other characters I have done all using the same basic technique:

Minnie Mouse

Alice in Wonderland


Beauty and the Beast
Angry Birds
Aladdin

Thanks for this awesome tutorial! Once I have enough time and ambition, I'll definitely be giving these a try.
ReplyDeleteThanks! The great thing about these cookies is you can work on them a bit at a time. When I do holiday cookies, I'm usually working overtime at my actual job, so I usually only have 30min-an hour a day to work on them. I just do a layer or step a day. And these kind of cookies stay good forever as long as you keep them out of direct sunlight and in a cool, dry environment =)
DeleteI find it hard to make my would-be-clients to understand how long it takes to decorate the cookies. A few of them felt disappointed when I asked for a week notice for orders. When I was giving a decorating class they were amazed by the lenght of the process.
DeleteIt's so frustrating! I think once they see the process they understand a bit more though. When I worked in a bakery we constantly got people wanting custom cookies day of or next day. We would usually show them cookies in progress and explain and they'd usually see what we were talking about. But I've worked on complicated cookies for almost a month before.
DeleteHi, I am a fellow cookie maker/baker. I have been practicing my trade for a few years but even so I found some great tips here. Your work is amazing. Thanks for the tutorial!
ReplyDeleteThanks so much! I love being able to share little techniques I've learned...glad they helped you =)!!
DeleteOh wow, you've really captured the likeness there! This would be such a fun crafty afternoon to get the kids involved with.
ReplyDelete