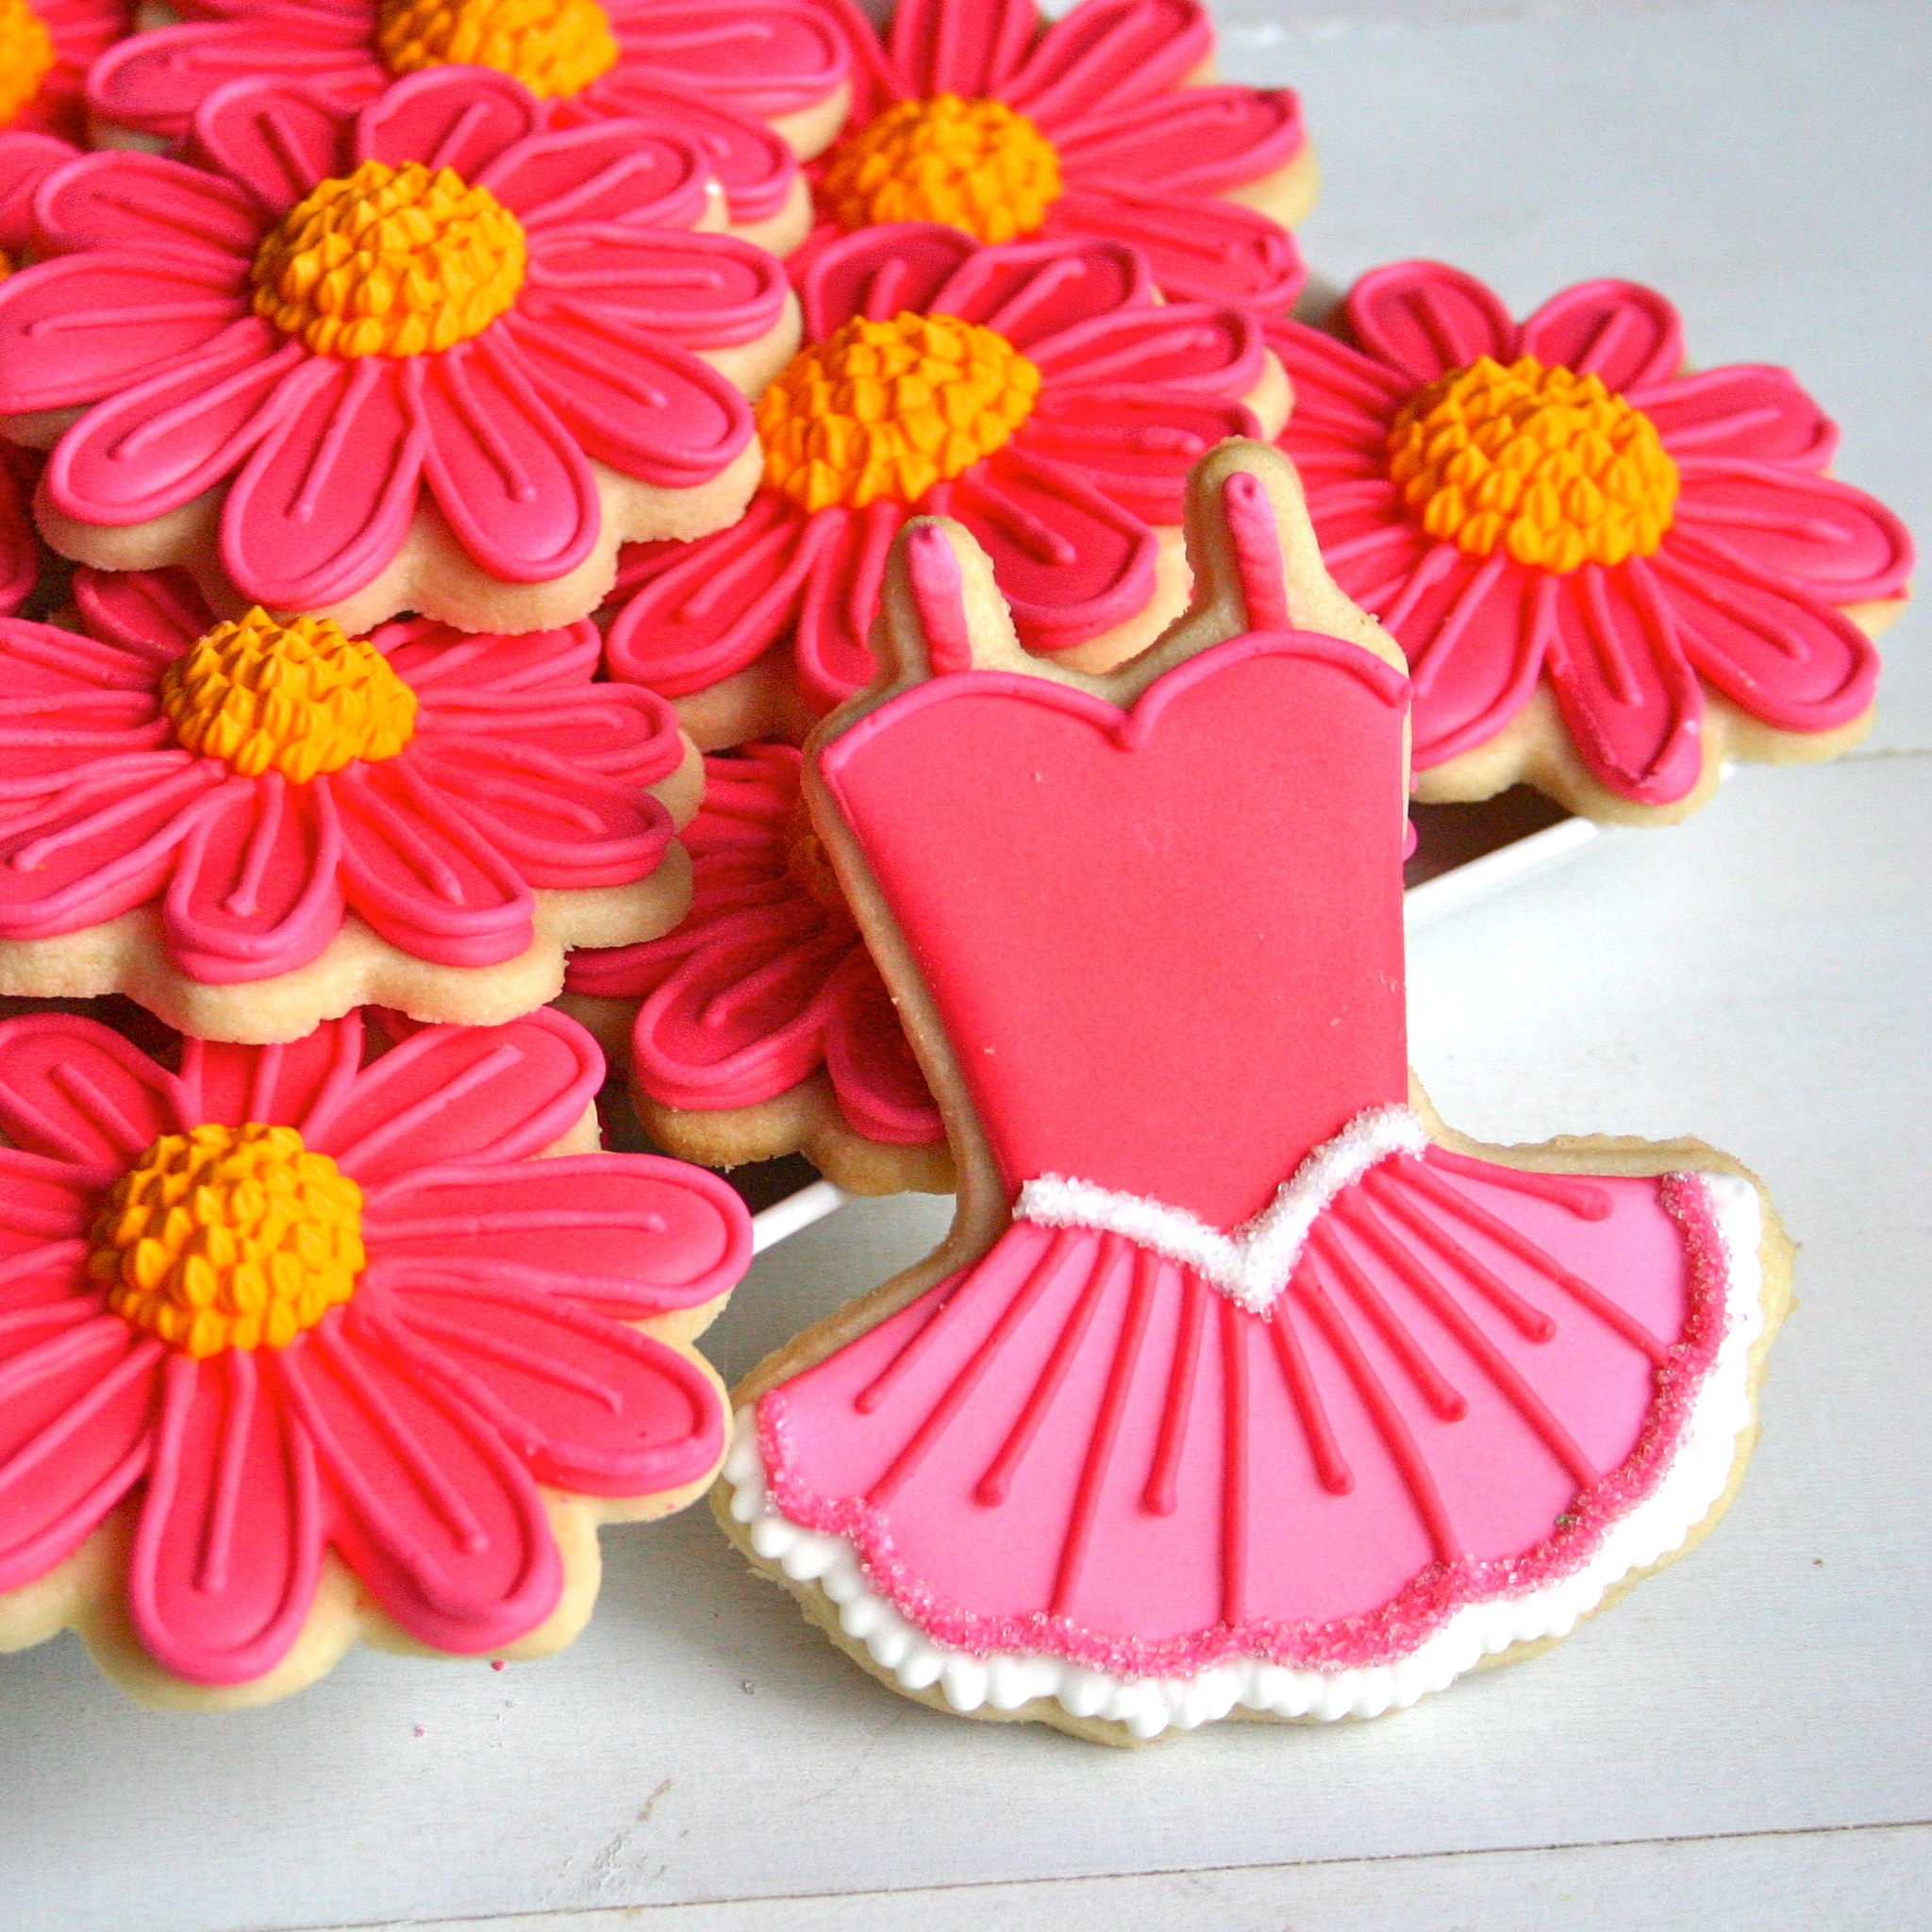
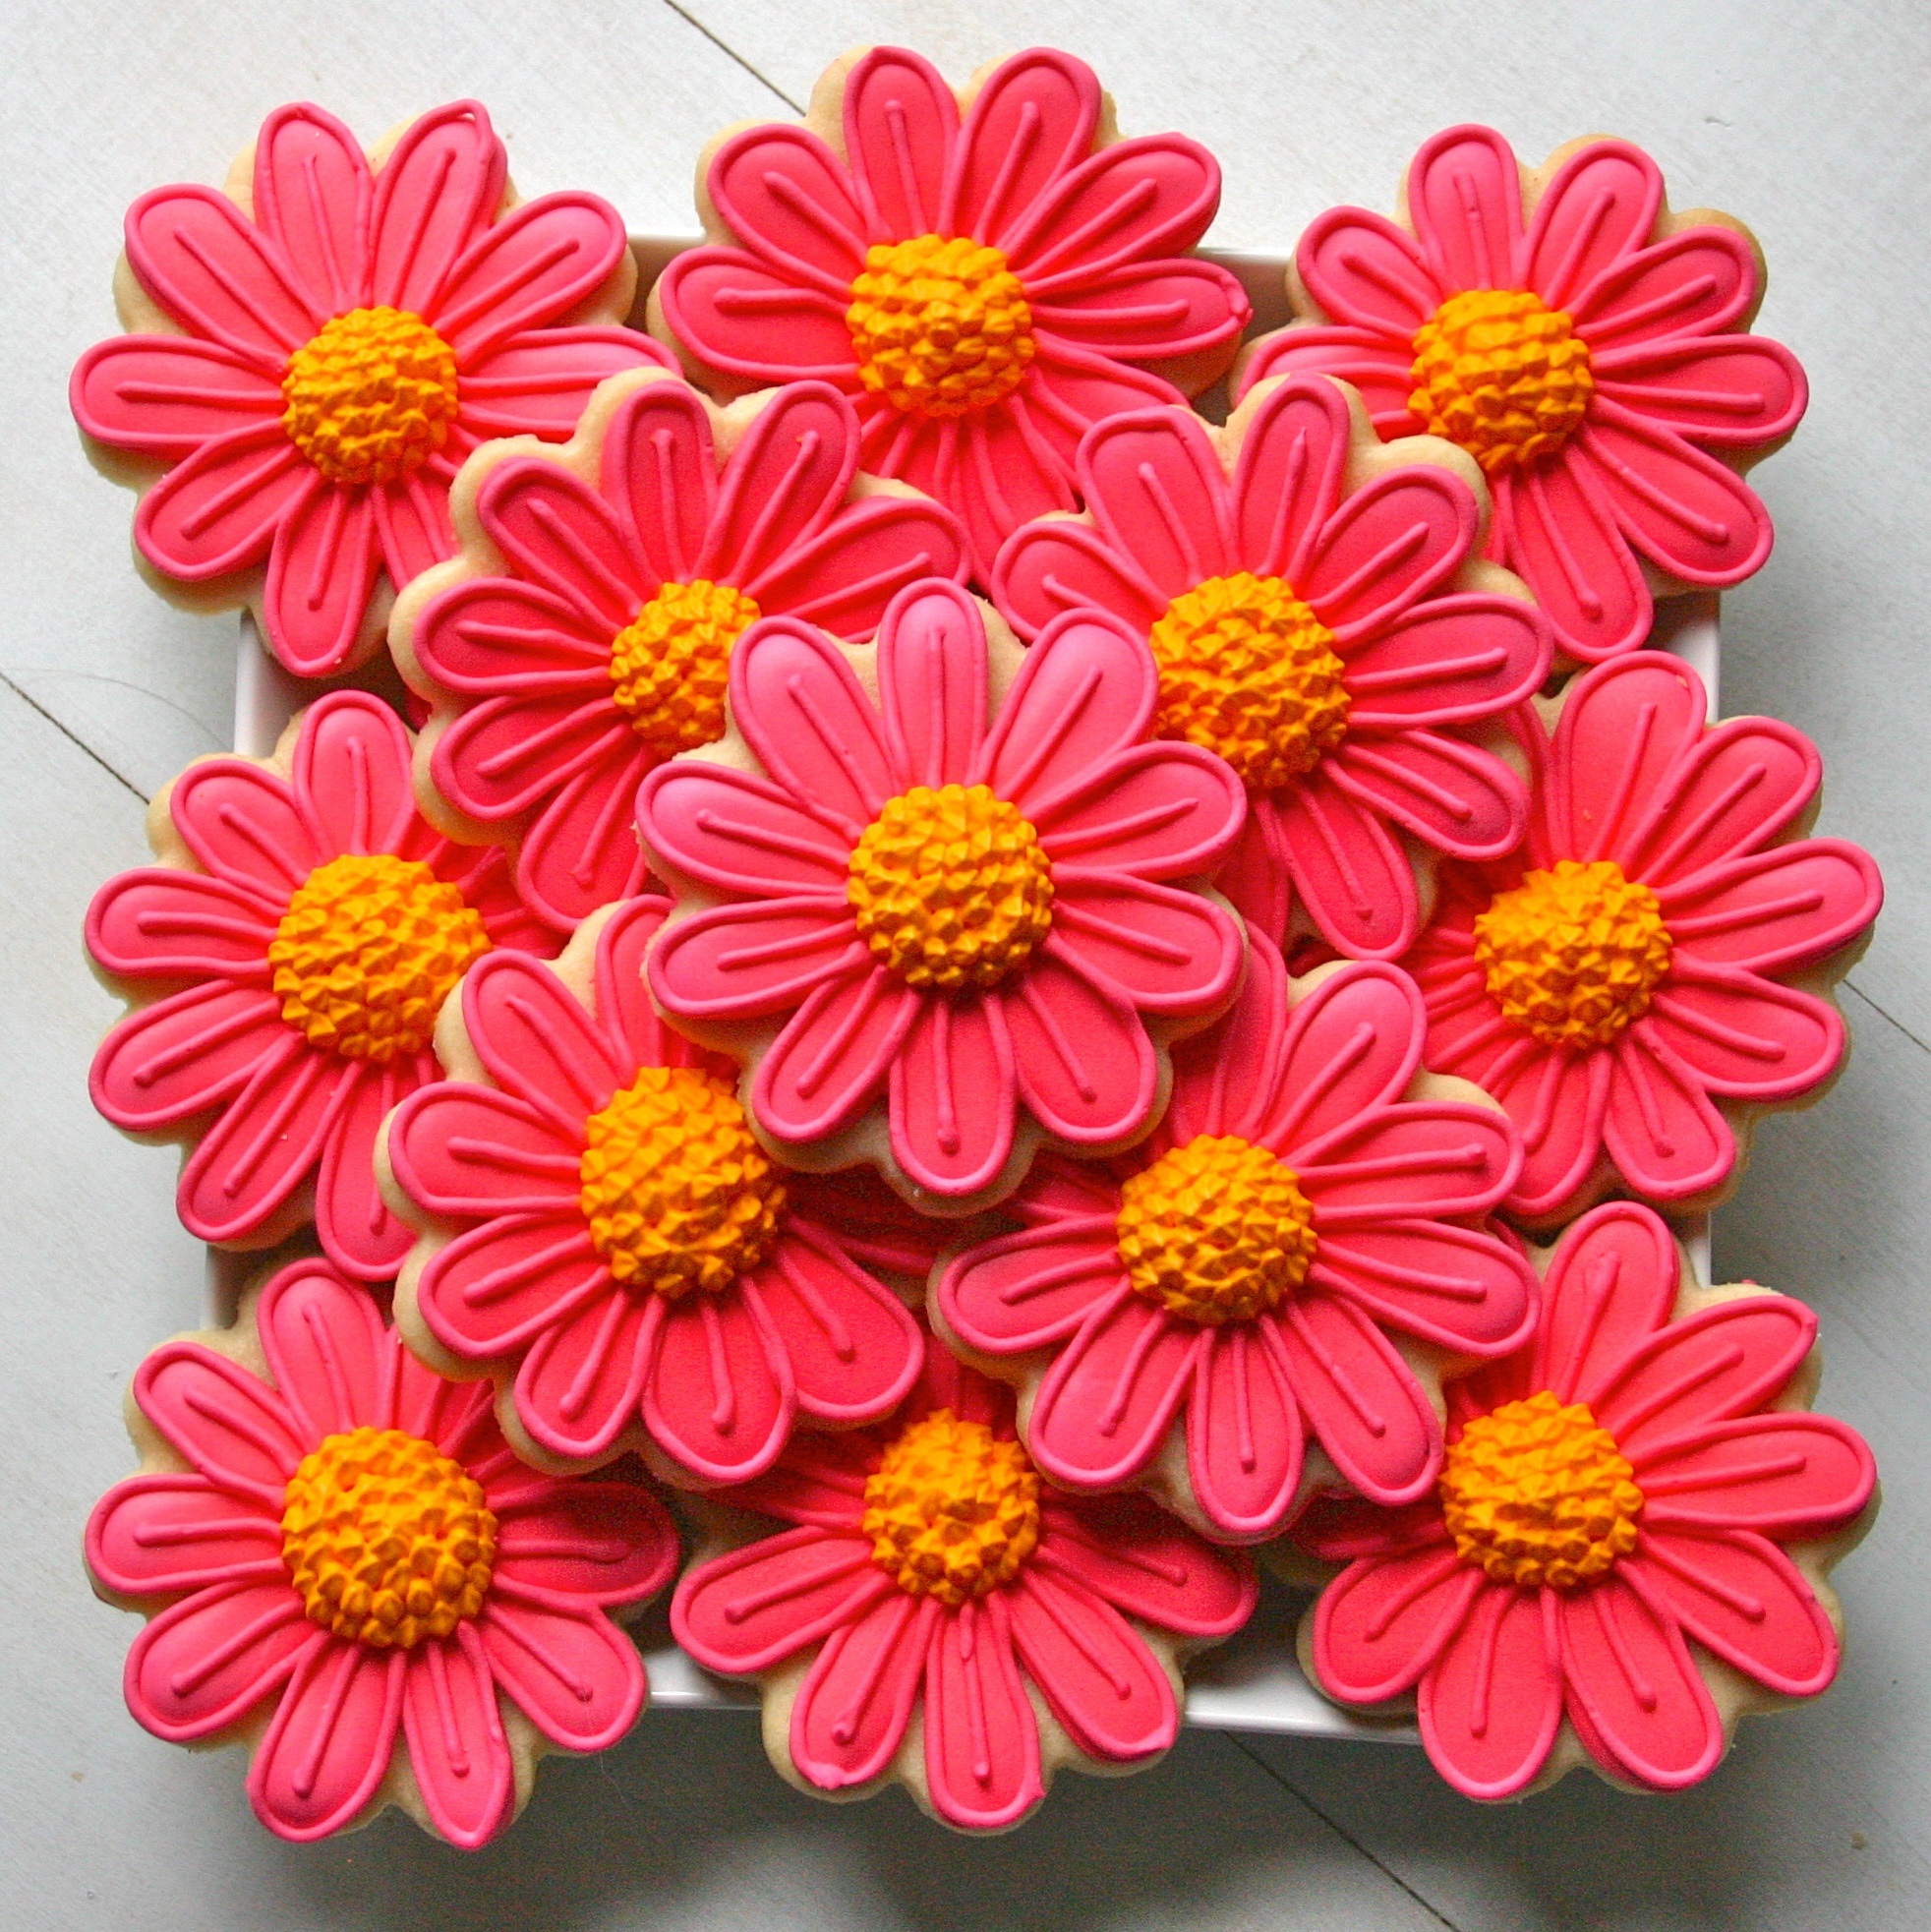
For my little cousin Samantha's 3rd birthday, I wanted to make Tutu cookies for her because she loves ballet. When I cut and baked all the tutus I needed I still had a lot of extra dough, so I cut the rest into flowers. Now, I was limited for time, so these are not gluten free, but I'm sure you could find plenty of recipes for gluten free dough on the web. I haven't perfected it yet with my own flour, but at work we just substitute Bob's All Purpose Gluten Free Flour in our regular recipe and it works great!
But back to the point, this is Jesicakes first decorating tutorial!! I'll show you how to make these flowers and those tutus. And the great thing about decorating, is once you learn principles like layering, you can apply them to make any cookie you want.
Royal Icing
Recipe by Martha Stewart
Ingredients
- 2 cups powdered sugar, sifted
- 5 Tbsp meringue powder or 2 large egg whites
- 1/2 cup of room temperature water
- 1-2 tsp lemon juice
In the bowl of a mixer with a paddle attachment.
Add the water and lemon juice and using the paddle mix the water in enough so it is mostly saturated.
Turn on the mixer on low until it is fully saturated. Then turn the mixer to medium high and beat for about 8 minutes. The icing should hold it's peaks when you turn off the mixer and raise the paddle.
I find it easier to thin icing than to thicken it, so I'd make the base batch thick.
Transfer to a sealed plastic container to keep the icing in while mixing the colors. The icing will dry out and harden if you leave it exposed.
Icings Colors and Decorating
-Pink Gel Food Dye
-Yellow Gel Food Dye
-3 #2 round tips
-1 #13 star tip
-4 couplers and 4 coupler rings
-4 pastry bags
-Loose Icings: Light Pink, Dark Pink-Thick Icings: Dark Pink, White, Yellow
-Opal or White sanding sugar and a paper plate (optional)
Each bag can be filled with about a 1-1 1/2 cups of icing. I just simply split my icing in four since I needed four colors keeping in mind though that I needed the most loose dark pink and the least thick white.
To make the loose icings, take your reserve royal icing and place it in a bowl. With a rubber spatula, mix in the food dye til you reach the desired color, loosen with approximately 1/2 tsp of water at a time until the icing settles into itself. This will create a nice smooth surface. Poor into pastry bags affixed with tips and couplers and tie the top off with a rubber band.
To make the thick icings, if straight from the bucket isn't thick enough, thicken with sifted powdered sugar. You want the icing to not settle when you shake the bowl. Add dye for the yellow icing. The white and dark pink icing go into the bags with the #2 round tips. The yellow goes in the star tipped bag. Tie off the bags with the rubber band.
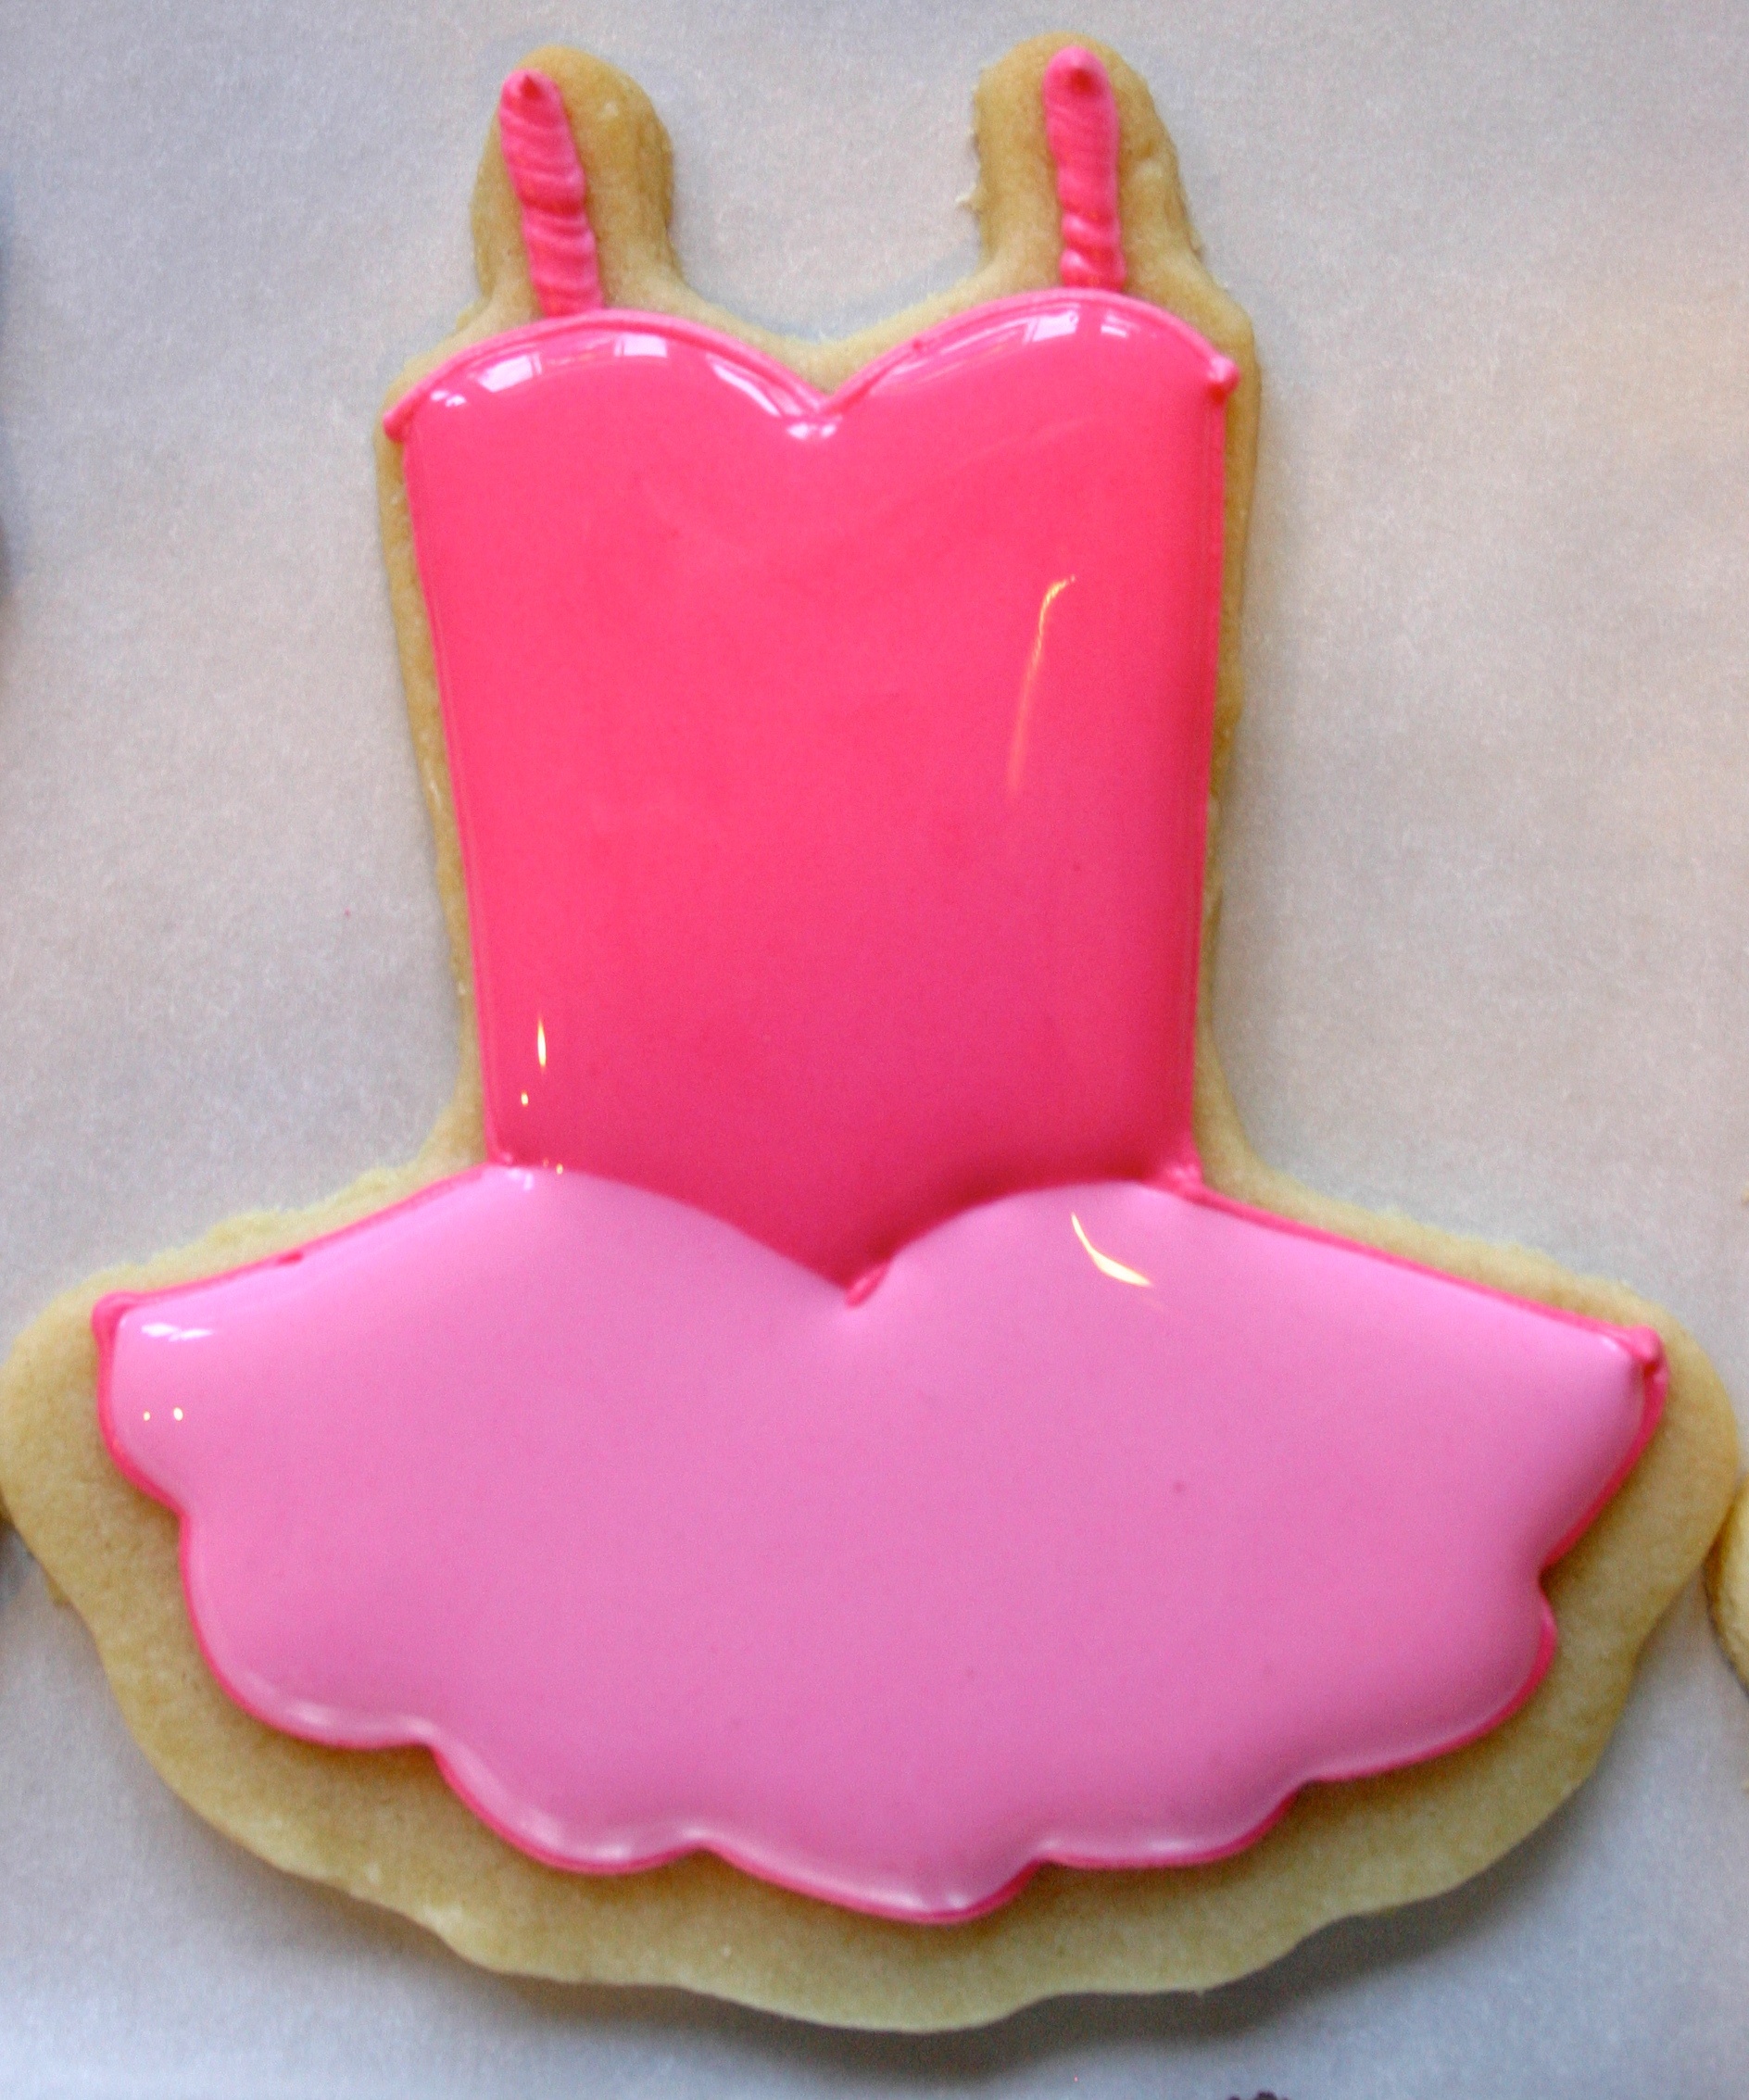
Outline the cookie in the thick dark pink icing. Leave about 1/4 inch at the bottom to save room for the ruffles, otherwise stick closely to the edge of the cookie leaving a tiny margin of cookie so the icing doesn't slide off.
Fill the top half with the loose dark pink.
Fill the bottom with loose light pink. Allow this layer to dry slightly before doing the next step. About 15-30 minutes.
Allow this first layer to dry at least a few hours. The top should be able to touch without marking and should feel smooth not tacky.
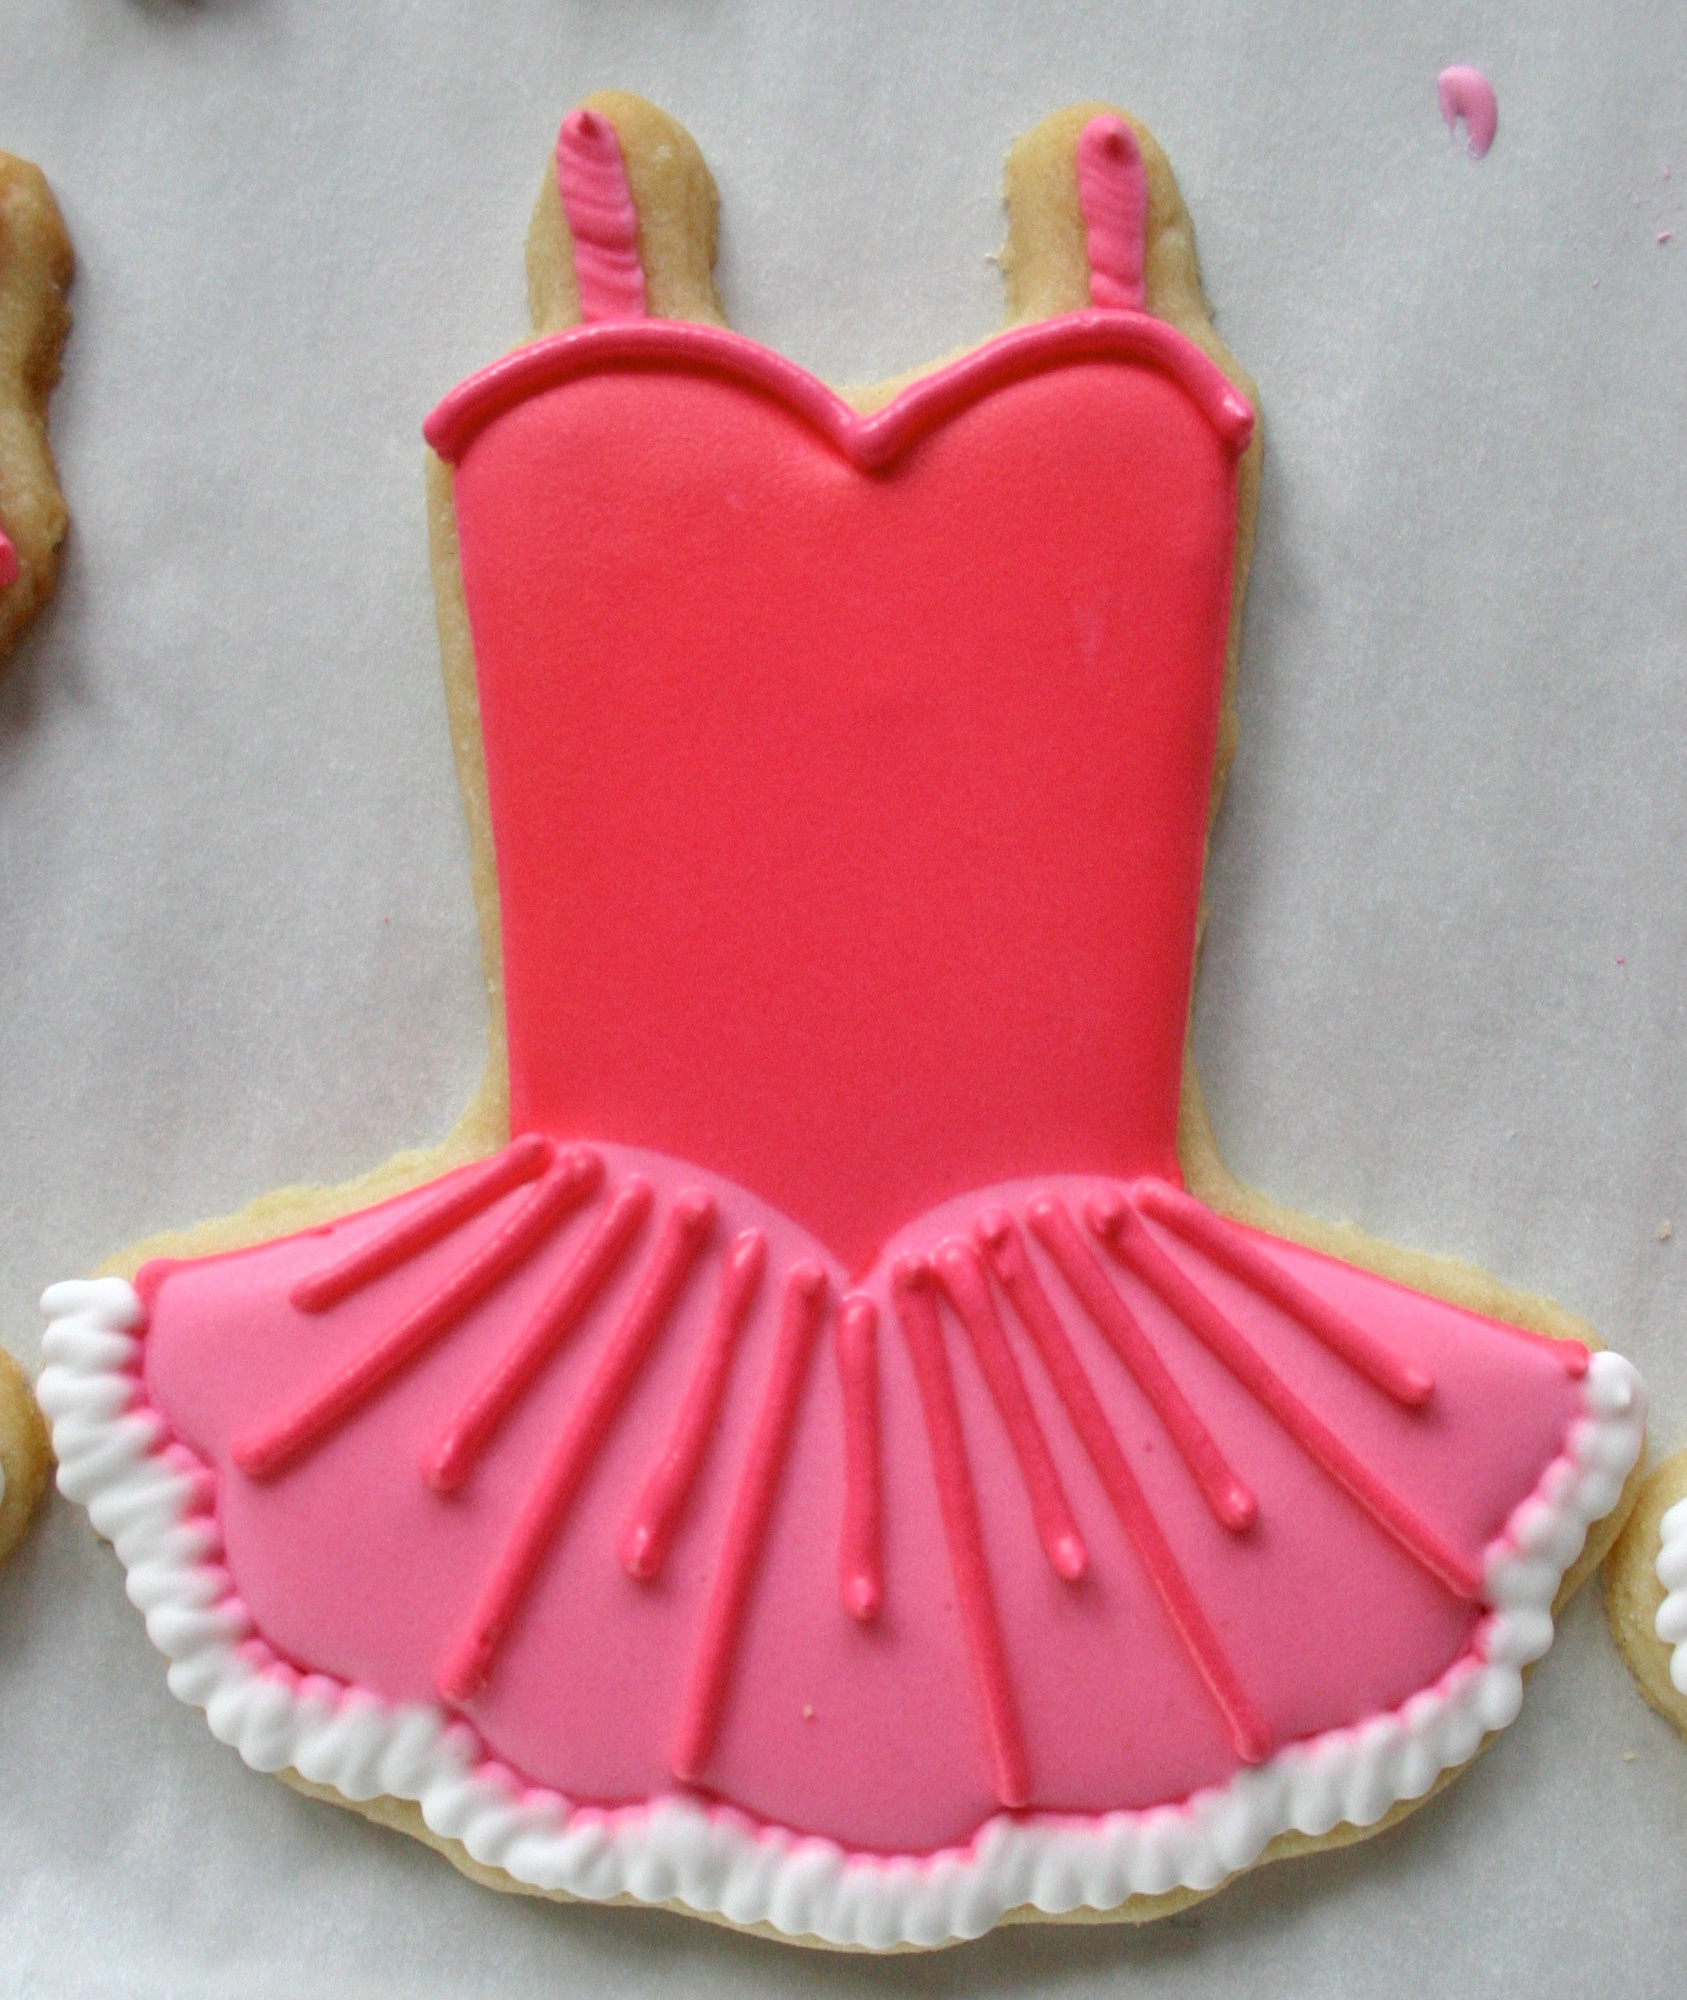
Add a thick dark pink line along the top of the tutu.
Allow these areas to COMPLETELY dry, depending on the humidity of where you are decorating that can be 2 hours to overnight. If you are sugaring, this is necessary or the sugar will stick to the entire cookie. If you are not using sanding sugar you can go right to the next step if you'd like.
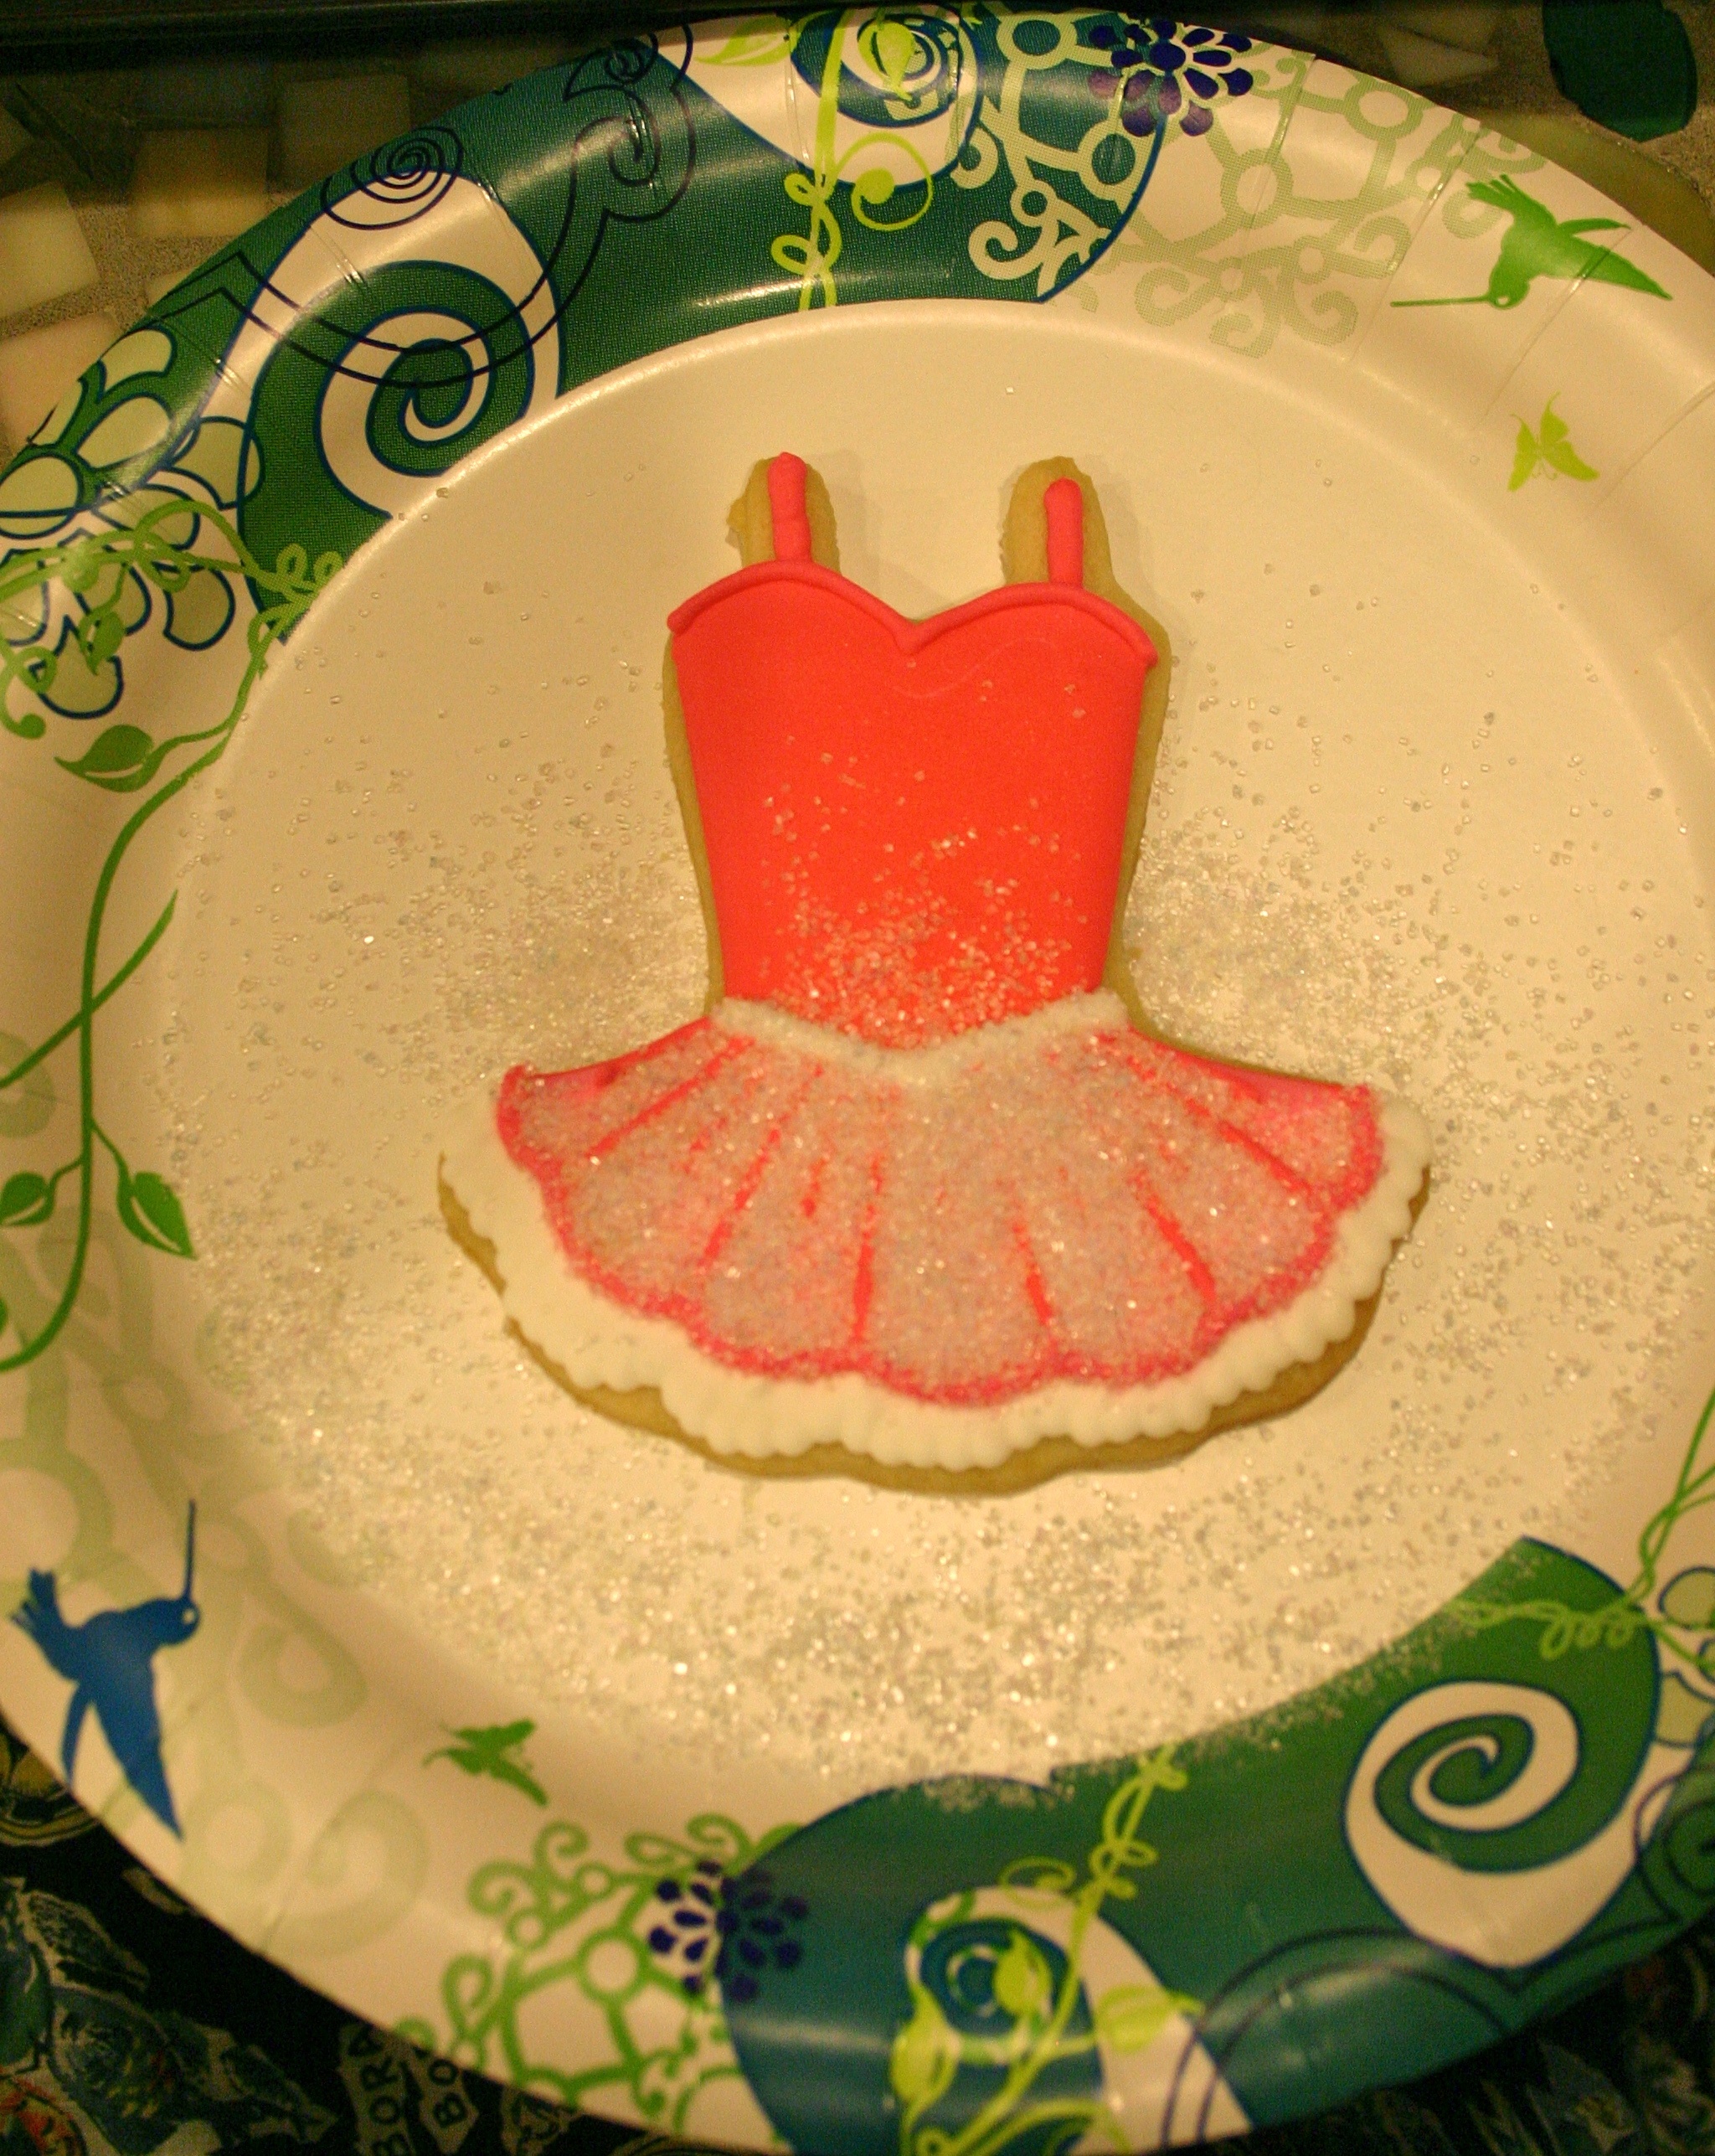
Add a thick white line to the waist and a thick pink line on the border of the light pink and the thick white ruffles.Transfer cookie to a paper plate and pour the sanding sugar over the cookies. Tilt the cookie and pour off the excess sugar.
Allow to dry for a few hours to ensure the icing is completely hardened and....
Viola!! Beautiful tutu cookies!
Now onto the flowers!
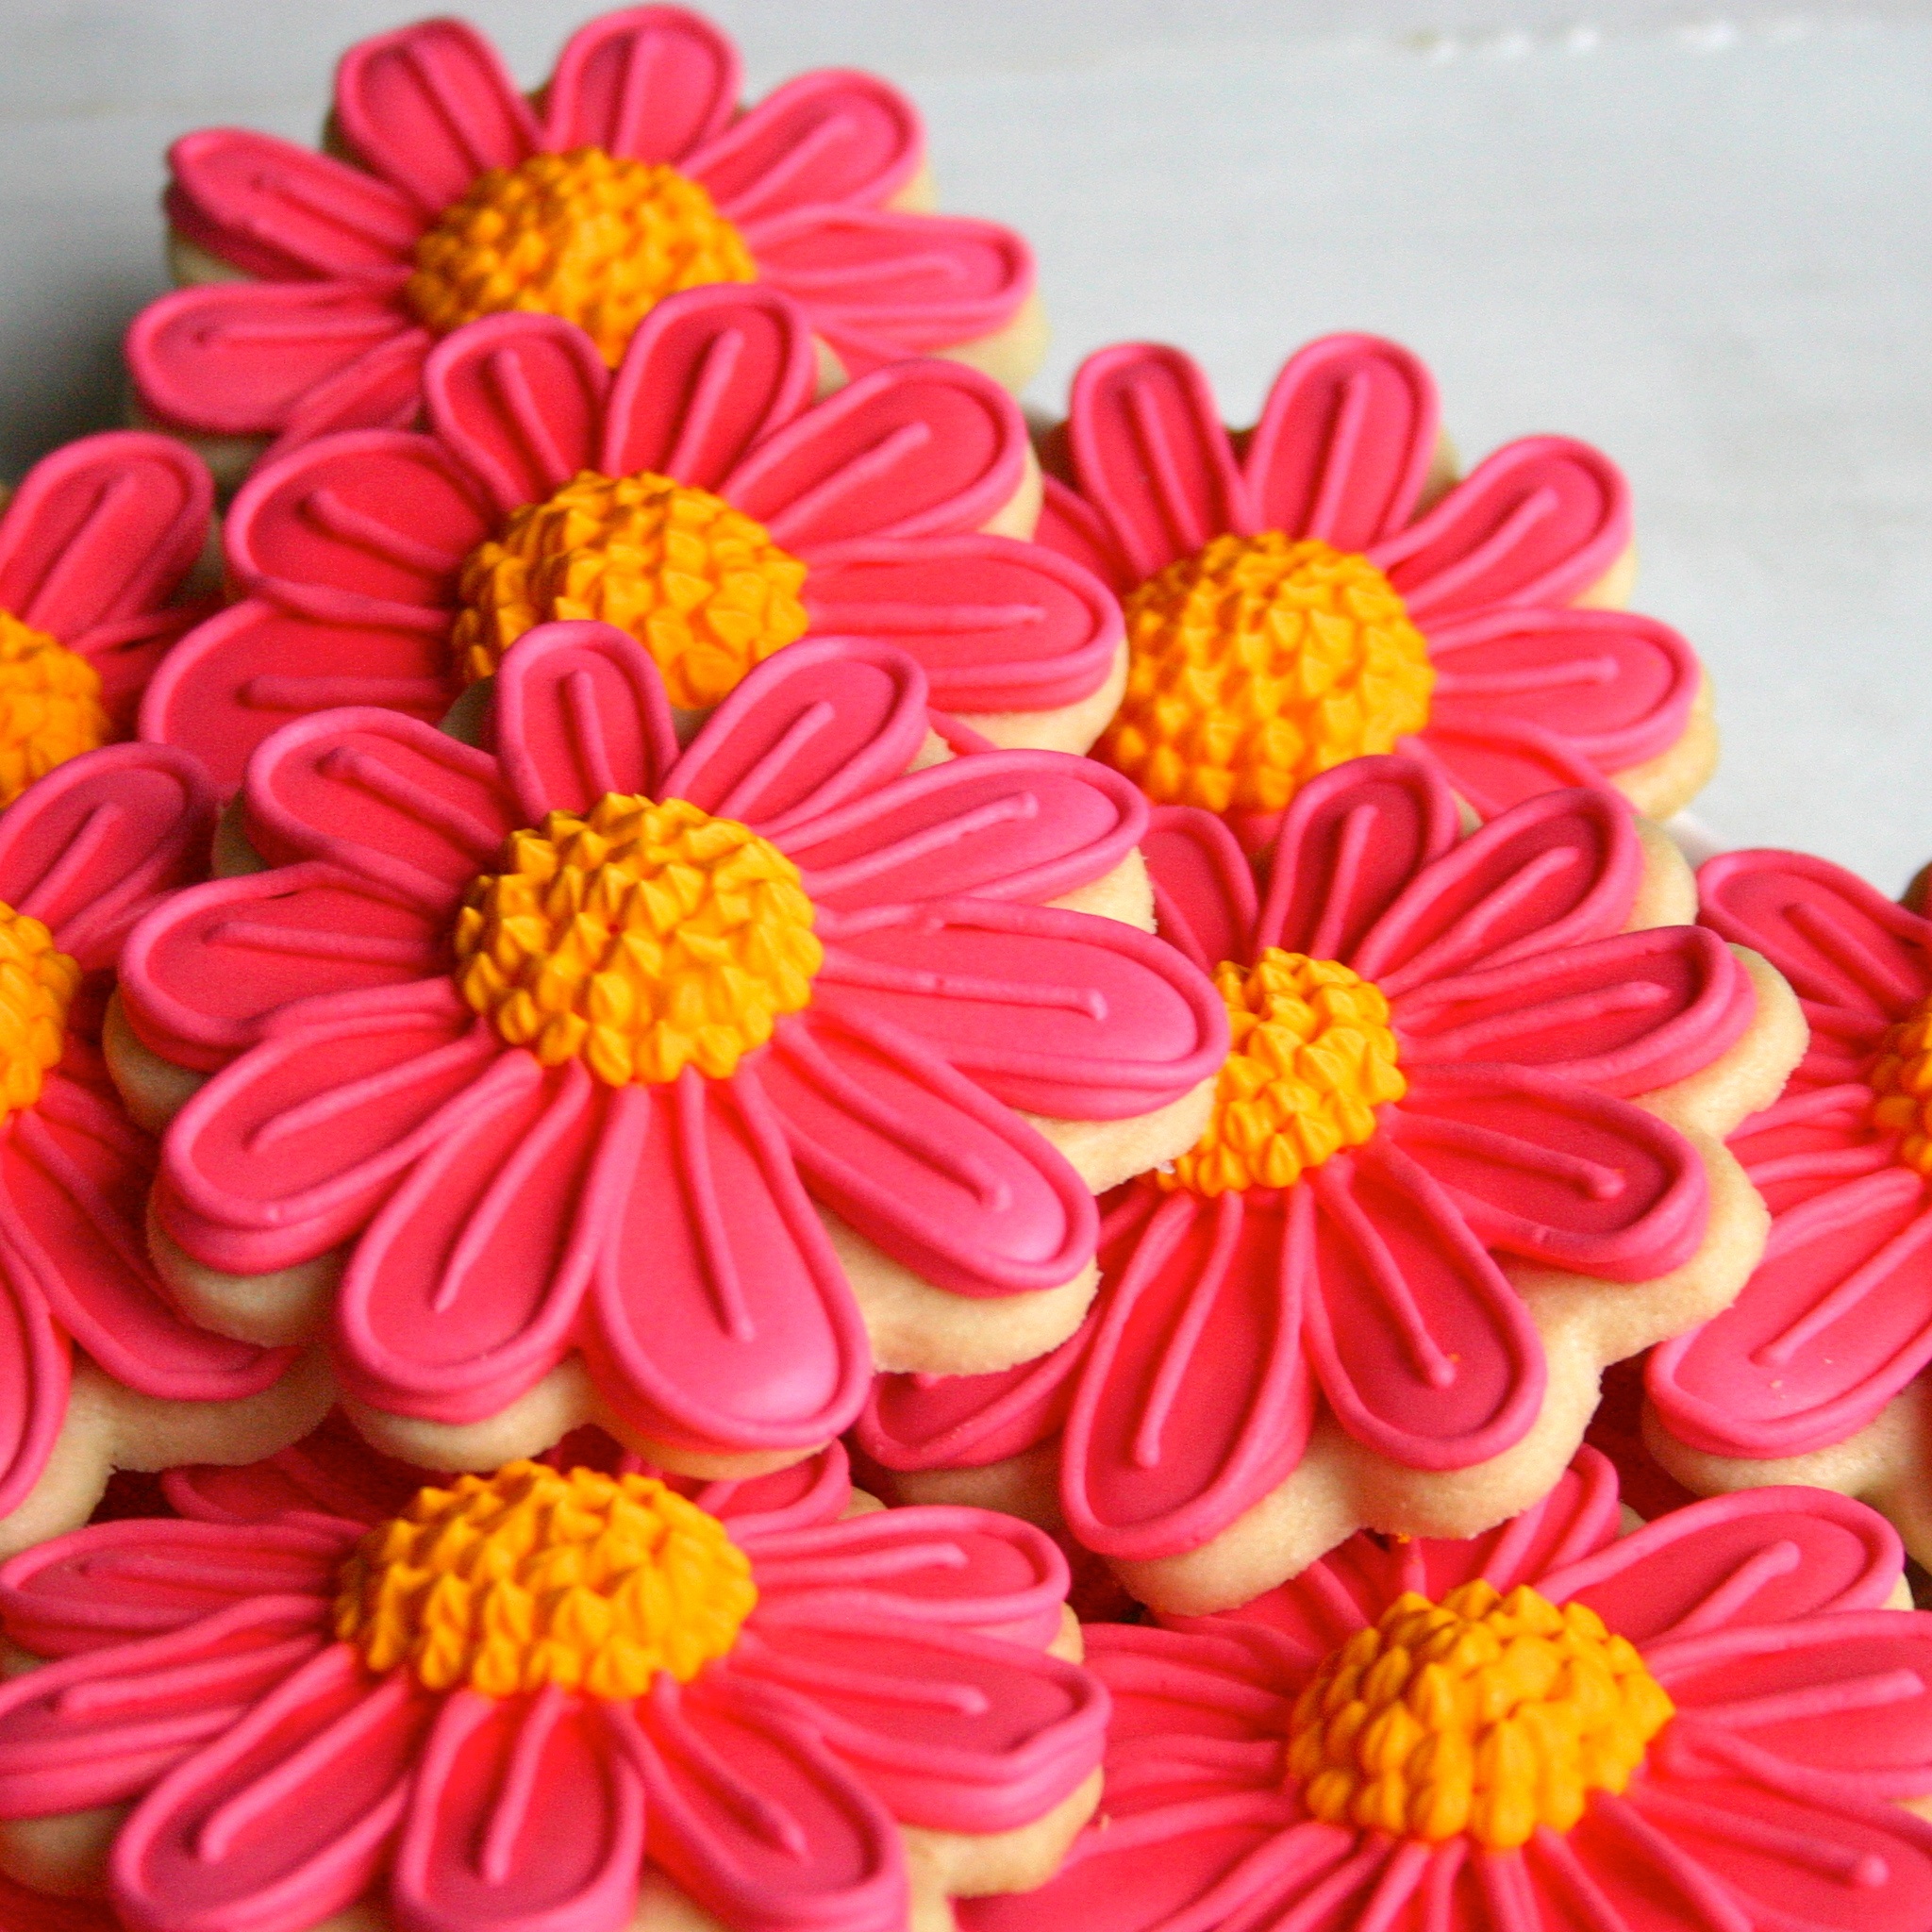
Outline the center of the flower in thick dark pink. Outline the petals as well.
Fill the center with fill light pink (you will completely cover this, but it'll hold the place for the center).
Fill the petals with fill dark pink. Allow this layer to be smooth and dry to the touch 1-4 hours.
Re-outline the center and petals with thick dark pink. Make sure the light pink is completely contained in the center.
Give the center of the petals a line from the center of the flower almost the the edge of the petal.
Fill the center with individual dots of the thick yellow.
Finally you will want to build up the center with the thick yellow. Starting from the outside, make circles with the yellow, each layer going in a bit until you build up a mound of the icing in the center.
And there you have it...bright colorful spring flowers!
Whatever cookie you were decorating, make either a physical drawing plan or a mental plan. You need to build the cookie from the bottom layer up.Iced sugar cookies are a great gift. They're bright, cheerful, and you can really do anything you want. I've done everything from flowers to detailed character replications. If you'd like to look at some of my work it's up on my flickr account here.











So cute <3
ReplyDeleteThanks =)!
DeleteLove the step-by-step for these beautiful cookies. Thanks!
ReplyDeleteThank you so much! I'm glad to share!
DeleteI love this. Never thought of icing a flower cookie this way. Many Thanks :-)
ReplyDeleteThanks so much! Neither did I til I was in the moment! I ran out of 2 tips and popped on that star tip just to prepare the bag and viola - Inspiration for a new design!
DeleteSo cute. Thanks for the tutorial. Where did you find the tutu cookie cutter?
ReplyDeleteThanks! It was ordered for me by my mom who had me doing the cookies...I believe she got it off ebay. I'm having trouble finding this exact one except for amazon uk (http://www.amazon.co.uk/Splat-Cooking-Stuff-Ltd-Copper/dp/B008VDLM46 it's not available...this is the cutter though I just modified it since it was for 3 year old girls).
DeleteThe site copper gifts is also good for buying good quality cutters and they have a few ballet related ones: http://www.coppergifts.com/cookie-cutters/pc/showsearchresults.asp?pageStyle=H&resultCnt=36&keyword=tutu&type=1&submit.x=-907&submit.y=-39&submit=Search
Hope that helps!!
Such a simple and effective technique. Thank you for keeping this tutorial so simple.Will definite try this it a great stuff.
ReplyDeleteThank you =)! I'm glad it helps! Happy decorating!!
Delete